Showing posts with label Felt House Along. Show all posts

Wednesday, March 24, 2010

Felt House Along - The Big Reveal!

We Finished! Hooray! Here is my finished Playhouse!

Here is a look at each side!


I hope the little girl that this is going to LOVES it! 

Follow along and make your own with our Felt-House-Along!
Week 1 - Planning and Supplies
Week 2 Cutting out the sides and Side 1
Week 3- Sewing Side 2
Week 4- Sewing Side 3
Week 5- Sewing Side 4, putting on the lettering and sewing it all together!


Visit thecsiproject.com

Saturday, March 20, 2010

Felt House Along Week 5 {Side 4, Some Lettering and Sewing it Together!}

Welcome to Week 5 of the Felt-House-Along! Today I am going to show you my finished side 4 and how I did my lettering. {I probably should have showed you the lettering during side 1- I think I will edit that post to add the lettering part in for anyone one else who finds this!}

Here is my finished Side 4! I made the tree and apples like I did on Side 3 and the window like I did on Side 2.

Here is how I made the basket:
1. I cut out a basket shape out of yellow felt and cute 8 strips out of brown felt.
2. I took 4 of my brown strips and pinned them diagonally onto the basket and sewed them on.
3. I then pinned the other four strips diagonally in the opposite direction (crossing over the first set of strips). I sewed the strips onto the basket.

4. I flipped the basket over and trimmed off the extra pieces of the strips.

5. I sewed a straight line across the top the finished the top edge.

6. I pinned the basket to the side. I sewed around the outside of the basket leaving the top open.
Now you can put apples in the basket once you have picked them!


Here is how I did my lettering.
I used Freezer Paper Stencils. I L-O-V-E Freezer Paper Stencils... I used them a lot. It is so easy and it looks so great! I knew I would not be able to cut out felt letters neatly. And I knew that I would not be able to sew them on neatly either. So the Freezer Paper Stencils was my solution to have NEAT letters.

1.Trace you word onto freezer paper (found at any grocery store or Target, Walmart, etc in the same aisle as the baggies). I like to print my words out in a font I like from my computer, but you can free hand it too.
2. Use an Exato knife to cut out the letters.
3. Iron the freezer paper (wax side down) to where you want you word to be. Make sure you iron is set to WOOL setting for felt (or it will melt... I know I melted some on my other felt house!) Make sure all your letters are stuck to the felt.
4. Dab your paint on over the letters. I use acrylic craft paint, and heat set it with my iron once it dries. You can also use fabric paint. I had to do 2 coats of paint for the felt.
5. Peel off the freezer paper (You can do this when the paint is dry or wet). Once the paint dries heat set it with your iron (set to WOOL).
There you have it --BEAUTIFUL letters! :)

This is how I sewed the whole thing together.
1. I sewed each side to the top (right sides together)
2. I sewed the sides together (right sides together)
Make sure you use pins, LOTS of pins. These are big pieces that you are working with, and you don't want them to shift and move on you. (I did not take pictures of this part... sorry!)

I will show you the BIG REVEAL of the finished felt play house on Wednesday! I will set up a McLinky on that day for all of us to show off our FINISHED houses! : )

Saturday, March 13, 2010

Felt House Along Week 4 {Side 3 - A tree and a Dog house}

I did it! I finished side 3 this week! I put a tree (with pick-able apples) and a dog house. Next week I am going to do side 4. I am also going to show you how I added the lettering to my house. You may have noticed that I have not added a name or address or any other words to my house with felt. That is because I Freezer Paper Stencil them on. It turned out much neater for me to do that way. I will show you that next week!

Ok on Side 3!

Here is how I made the apples:
1. I made a pattern out paper so that they would be the same size and shape. Cut 2 piece from the apple pattern.
Also cut out a leaf shape.
2. Sew on a square of Velcro. (I used the soft side of the Velcro for the apples and the rough side for the house side) You can also sew on the leaf.
3. Sew the two sides together with RIGHT sides facing OUT. Leave a opening to fill with stuffing.
4.Fill with stuffing and sew the opening closed.
Repeat for how ever many apples you want.
Here is how I made the tree.
1. Sew your grass on to your side and cut out a tree shape (I cut out 2 tree shapes that are the same. I am going to put the other tree on side 4 to match up on the corner) Pin and sew your tree trunk and branches to your side.
2. To add the leaves, I cut out several leaf shapes. I pined the first layer of leaves down...
...and I sewed them on with one line down the middle. Don't they look like leaves now. It also adds dimension.
3. Add another layer of leaves over lapping the first layer, filling in any gaps and sew on the same way.
If you are going to add apples or fruit to your tree, sew on the Velcro square now.

Here is how I made the dog house.
1. Cut out the house shape and sew it onto the side. Sew around all 5 sides (including the bottom).
2. Sew on all the trim and accessories onto the house as well. .
3. Now sew a line about 1/4 and inch away from the trim on the inside of the trim. Do this on both side. (it is hard to see the stitch so I drew a line to help you see it)
4. Cut in between the trim and the line that you just sewed to make the flap door. (This is a horrible picture but it is the only one I got of this) I really like how this door turned out. I kind of wish I would have done the front door in a similar way.
Side 3 all done! This will be the back side of the house.

How are you all doing on your houses? I would love to see the progress or if you have already made a felt playhouse I would love for you to link it up below.

This McLinky is ONLY for the felt house along... please use the Show Off Your Stuff McLinky for ALL other projects! I will delete any link that does not have to do with the felt house along!
Thanks! : )


Wednesday, March 10, 2010

I'm Sorry! Felt house along Week 4

I am SOOOO sorry, but I did not complete my next side for you all in time... I am going to finish it up and get it posted by Saturday (Which is technically this week so I am not REALLY late!)

My two year old had his shots on Monday and we took it easy on Tuesday, so no work on the felt playhouse was done.


I am hoping that enough of us are a little behind and could use the extra few day that it does not make a mess of things! : )

Let me know if you have any question from the other weeks! : )

Wednesday, March 3, 2010

Felt House Along - Week 3 {Sewing side 2!}

Are you ready for the second side today! Here we go!

Today I am going to show you how I added a window and some cute ways to embellish your sides!


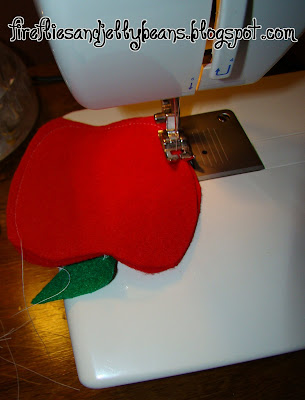
First gather all the supplies for your side. I used felt for my grass and duck, some $1 flowers I got from Target Dollar spot, and my window template.
If you are looking for a cute way to add a little friend to your house. Here is what I did: I googled duck clip art and looked until I found one I liked. I imported it into Word and printed it out to use as a template for my duck. I cut out each part of the body and pinned them to the felt.
Now for the window!
I used my window template. I made it from a piece of paper. It is 8.5 X 8.5 inches square. I would not make your window bigger then this as your little one might try to climb through it! :)
I placed my template 6 inches from the side and 6 inches from the top and pined it into place.

To cut out the window out, I used my rotary cutter and self healing mat. I placed the mat under where I had the window.
and I used my clear ruler as a guide and cut around the square

For the trim I like the Miter Edge look.
Here is how I did it.
I cut out 2 X 12.5 inch strips (4 of them) and 2 X 10.5 inch strips (two of them)
{The 2 X 12.5 strips are for the trim
The 2 X 10.5 strip are for the cross inside the window.}

For the mitered edge strips here is the formula that I used:
W= width of strip
L = Length of the WINDOW side

So, the strip should be W by (L + 2W)
So my W= 2 and my L = 8.5 so my strips were
2 by 8.5 + 2(2) = 8.5 + 4 = 12.5--- 2 X 12.5
{Ha ha! I got you to do a little algebra! : ) I am a math teacher, you know! }
I took the 2X10.5 inch strips and folded them in half and sew down both sides.
Now we are going to miter the edges of the 2 X 12.5 strips.
Take your strip and line it up on the corner of your cutting mat. Use the 90 Degree line to get your diagonal cut.
Flip your strip over so it looks like this and cut the 90 degree angle on the other side.
You should have a nice trapezoid like the one below!
Now that you have all your trim and cross cut out, place them on your window and pin in place.
Sew around the trim in the outside and inside edges to hold it in place.
(here is a close up)
Now, we are going to clean up the corners.
Set your zig zag width to 4 and the stitch length to 1.
And sew down the diagonal of your corner


Now lets add some more things to this side!
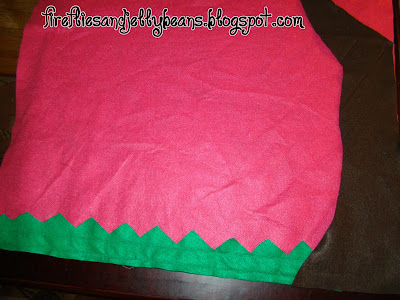
I sewed on some green felt in the shape of a hill. I left the top of the hill open and sew 3 vertical lines going up to make the pockets for the flowers. My pockets are about 2.5 inches wide.
Next I sewed on the details of the duck and added some buttons for the eyes (before adding him to the side). I pinned him in place.
{Wow he looks kinda mad... I think it is the pins in a V that look like mad eyebrows!}
I sewed around the outside of the duck and I left an opening on both the head and the body so that I could stuff him.


I finished sewing around the duck and all done!

How are you doing on your house? I'd love to see and hear all about it! Also if you have any questions let me know. I try to e-mail the answers to those who have a e-mail attached to their profile. If you don't then, I answer them in the comments.

This McLinky is ONLY for the felt house along... please use the Show Off Your Stuff McLinky for ALL other projects! I will delete any link that does not have to do with the felt house along!
Thanks! :
)


Content Ad