So, glad to be joining in Craft Lighting this month again! This time the theme is Holidays!
Growing up my family always got or made ornaments that had to do with what the past year held. So, I wanted to carry that on with my kids. A few years ago we went to South Carolina (to visit my sister) and collect a bunch of shells from the beach. So at home we picked out some shells and decorated them for our tree.
It is super easy to do!
1. Select your shells. I liked to find ones with holes in them already to give a place to tie a ribbon but it is not necessary.
2. Paint the shells with either glitter paint or any color that matches your docore. We liked gold/ glittler red and silver. Get the kids involved!
3. Let dry and attach the ribbon. If there is not a hole just use hot glue!
4. Hang on the tree.
Since it was the babies first Christmas we made a little shell baby too, by glueing a couple shells together and adding a face!
I know camping season is pretty much over - but I feel like bonfire season is just getting started so you can still use this hack!
We needed some roasting sticks, but all we could find were these short ones... they are line 2 feet long. Seriously, who what to only stand 2 feet away from the fire? Not me and not my kids. So we came up with a way to make them longer using PVC piping!
Here is how we did it.
Supplies:
Short marshmallow roasting stick with a wood handle
2ft PVC pipe.
Ours were 1.5 inches thick and it was precut to 2ft at Home Depot in the plumbing section. They were $2 per 2 ft pipe. Measure your handle to see how thick you need your pipe.
Screws and a Drill
1. Pre-drill the holes for screws into the pipe. We did 2 screws for the handle about 2 inches apart.
2. Screw in the screws into the pipe and handle. This took 2 people. one to hold the stick in place and one to drill.
3. Add a hanger (optional) these hangers were on the original roasting sticks so we just took them off that and added it to the pipe.
4. Enjoy roasting your marshmallow from a safe distance!
We have a hanging plant holder that we use to hang them in our back yard.
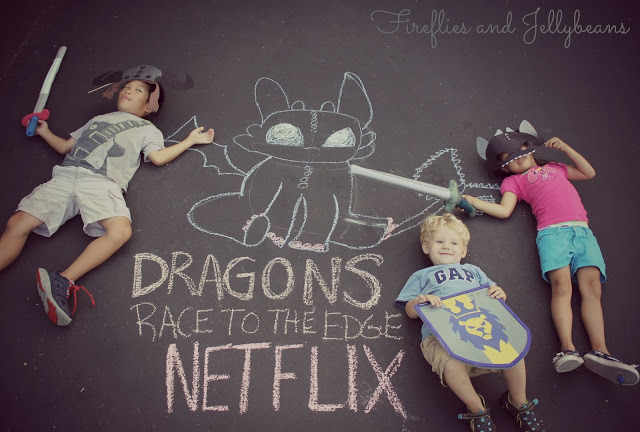
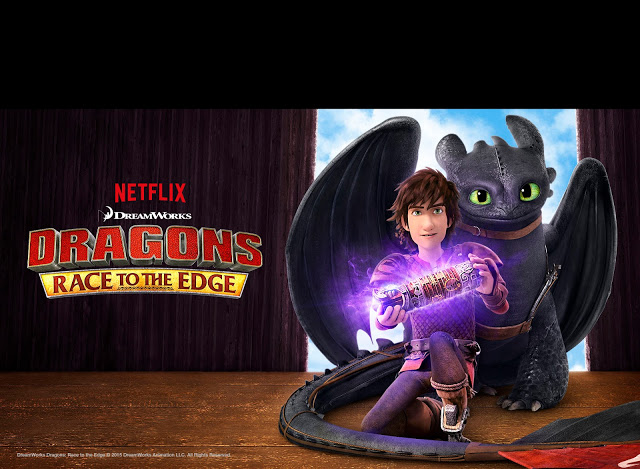
Thank you to Netflix for sponsoring this post. As part of the Stream Team I get to talk about a theme each month. This month Theme: Dragons!
Netflix has a new series Based off the the hit movies: How to Train Your Dragon 1 & 2 called Dragons: Race to the Edge, and my kids are loving it! It is easily their favorite show to watch now. I mean what is not to love about Hiccup and Toothless?!
As part of the the Netflix Stream Team, I got a box full of goodies to help celebrate the new Dragons series! It came with all sort of fun stuff, but the map is my kids favorite. It is so cool to see them play with the map creating their own adventures.
To join in on their fun I decided to have a dragon picnic.
After consulting my mom and sister (my creative team!), I came up with a fun menu. All super simple- because I do not have time to sculpt Toothless out of brownies! I made ship sails out of paper and toothpicks.
The kids (needless to say) LOVED it. The thought it was so fun to eat picnic style on the floor. We ate on our Dragon blanket (part of our box of goodies)
And because no picnic is complete with out a game, we made up a Dragon Racing game.
In the 2nd movie they have Dragon races where they collect sheep for points and the black sheep is worth 10 points. In our game we hide square legos (Use what you have) as our sheep. The Golden lego is the golden sheep and it is worth 10 points. I hide the legos around the yard (think Easter Egg hiding). I hide the golden "sheep" harder since it is worth more. The kids decorated their stuffed animals to be their Dragons and they race around the yard finding the "sheep" and bringing them back to their buckets. We play several rounds.
My daughter named her dragon: Fireball and my son named his dragon: Tornado Fire.
After the 4th of July- Target switches their seasonal aisle to Back-To-School... so it is time to start getting ready to send those kids back! This month's Craft Lighting theme is Back-To-School!
I pack a lunch for my kids everyday and I like to put a water bottle in it. I found these little water bottles in a 2 pack at the Dollar Store -two for a dollar- yay! But I also know that my kids are forgetful and I would like there to be a chance they could get their water bottle back if they forgot it so I personalized it with their names and a favorite character! It is SUPER EASY!
Here is how you can make your own.
1. Gather your supplies: Water bottles, Temporary Tattoos, Outdoor Adhesive Vinyl (I get mine from Expressions Vinyl)
2. Cut out your letters. I use my Silhouette Cameo.
3. Place the letters on the water bottle.
4. Cut out the Temporary Tattoo
5. Use a wet, warm paper towel to adhere the Tattoo to the water bottle. and you are done!
I got the water bottles and the temporary tattoos from the dollar store and I already had the vinyl form other projects. So, I was able to make these for $1 per bottle.
The Tattoos totally stick to the water bottles! They will wash off in the dishwater though... which I am ok with. The letters stay on. I got a pack of 28+ Temporary Tattoos at the Dollar store and I just stick on a new one once I wash it. The kids like that it changes. I usually use a bottle for a week in their lunch bag and then wash it.
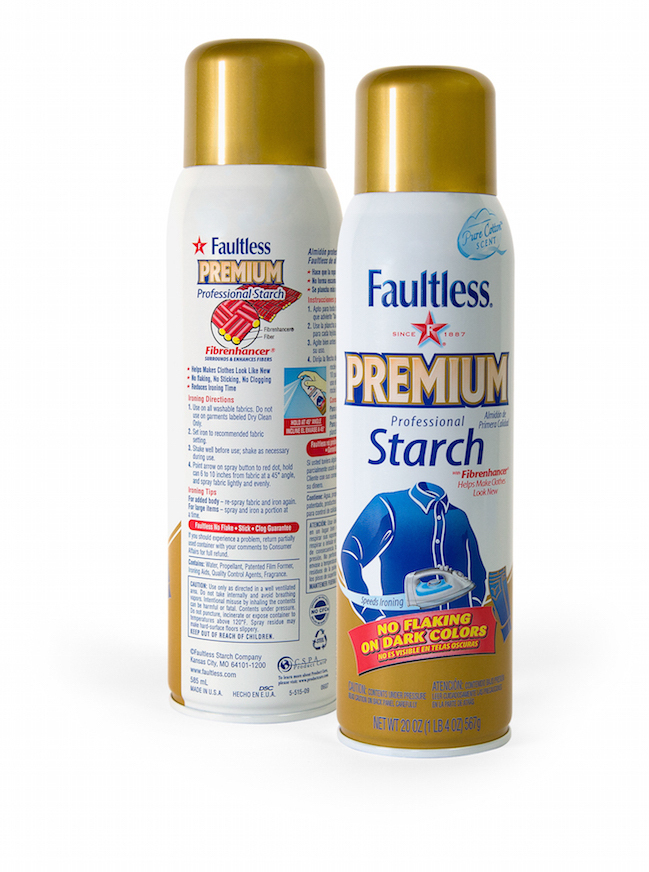
Faultless Premium Spray Starch is a great way to keep your clothes looking their best. It is the starch that performs so that you can look your best! And when you look your best, you can feel your best and preform your best too! The Faultless Premium Spray Starch bottle will not clog, flake or stick, unlike other brands. You can find Faultless Premium Spray Starch in the laundry aisle of most major retailers.
Faultless Premium Spray Starch not only makes your clothes look like new, it is also useful in sewing and crafting... in this case a none-sewing craft!
Here is how to make your own:
1. Gather your supplies:
Fabric 1/4 yard (You could also get a fat quarter if you don't want to get it cut)
Binding (found at fabric store by the zippers)
Faultless Premium Spray Starch
Paper for template
Scissors
Hot Glue
2-3 Create your pennant template. Fold a piece of paper in half and use a straight edge to make a triangle shape like the one below. Then open it up and you have your template. Put aside.
4-5 Iron your fabric and binding with Faultless Premium Spray Starch. Just spray and iron. This is so helpful. It really gives the fabric a great look and it also gives it the stability that it needs to hold it's shape. And it makes the cutting so much easier!
Use your template to cut out your pennants.
Option 1:
Using your Faultless Premium Spray Starch, iron the rough edges over to make a fake hem. Again the starch gives it the stability and strength to help hold it's shape. You only need to do the 2 sides going down... the top will be covered up.
Option 2:
You could use pinking shears to cut your your pennants to make sure no fraying happens.
Finishing:
Open up your binding and place your pennant inside. Use Hot glue to secure it to the inside and fold the binding back over. I start at the middle and work my way out on either side evenly spacing the pennants. You could also sew it instead of glueing it... but I was going for no-sew!
And done!
These are great for kids rooms, parties, home decor, gifts, showers!
I love being a part of craft lighting every month! I like being challenged to think of an easy craft for each theme! This month's theme is weddings. Since i don't have any weddings that I am going to this year I created something for my parent's 40th wedding anniversary. But this could easily be used as wedding or bridal shower decor.
I made 2 signs... they could be used anywhere... the card basket, guestbook table, head table, etc...
Here is how I made them:
#1 Circle Wedding sign:
1. Gather supplies: Embroidery hoop, Canvas (or other study fabric), Pom-pom trim, paint/brush, hot glue gun.
2-3. Iron your fabric and place in the hoop. Trip edges off and secure with hot glue on the back.
4-5. Decide placement of the pom-pom trim and use hot glue to attach it to the back.
6-7. Use a pencil to draw out your letters and then paint over.
#1. Rectangle Wedding sign:
1. Gather supplies: Cardboard scrap, Canvas (or other study fabric), Pom-pom trim, paint/brush, hot glue gun.
2. Iron the piece of fabric that is at least 1 inch bigger on each side of your cardboard.
3. Cut a slit into each corner.
4. Fold over the top and the bottom using hot glue to attach it. either cut off or fold over the extra fabric at the corners. repeat for the other sides.
5. Decide the placement of your pom-pom trim and hot glue it to the back side.
6. Using a pencil draw out your letter and then go over it with paint.
Tip on making letters with paint. If your paint is too thick it will make it harder, so I add a little bit of water to my paint to help it go on smother. Also you want to keep your brush full of paint so you will have to reload often.
join in the fun with more easy and fast wedding crafts:
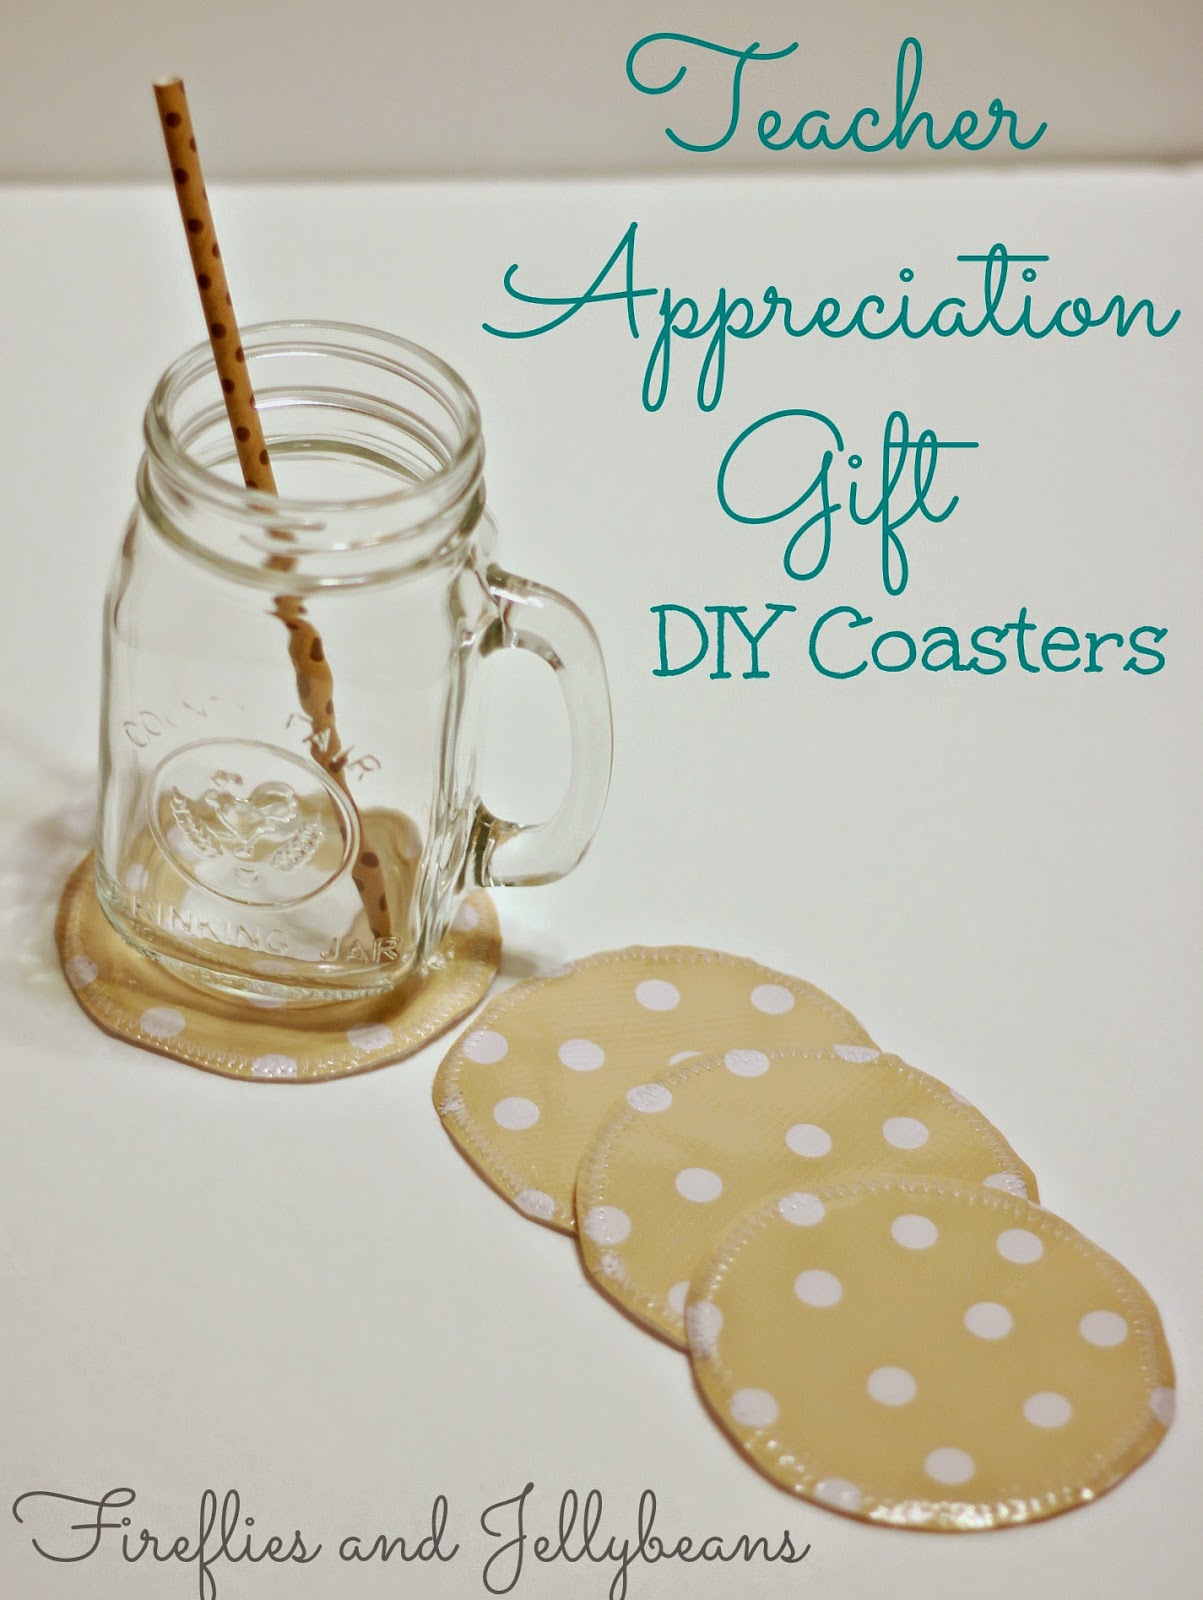
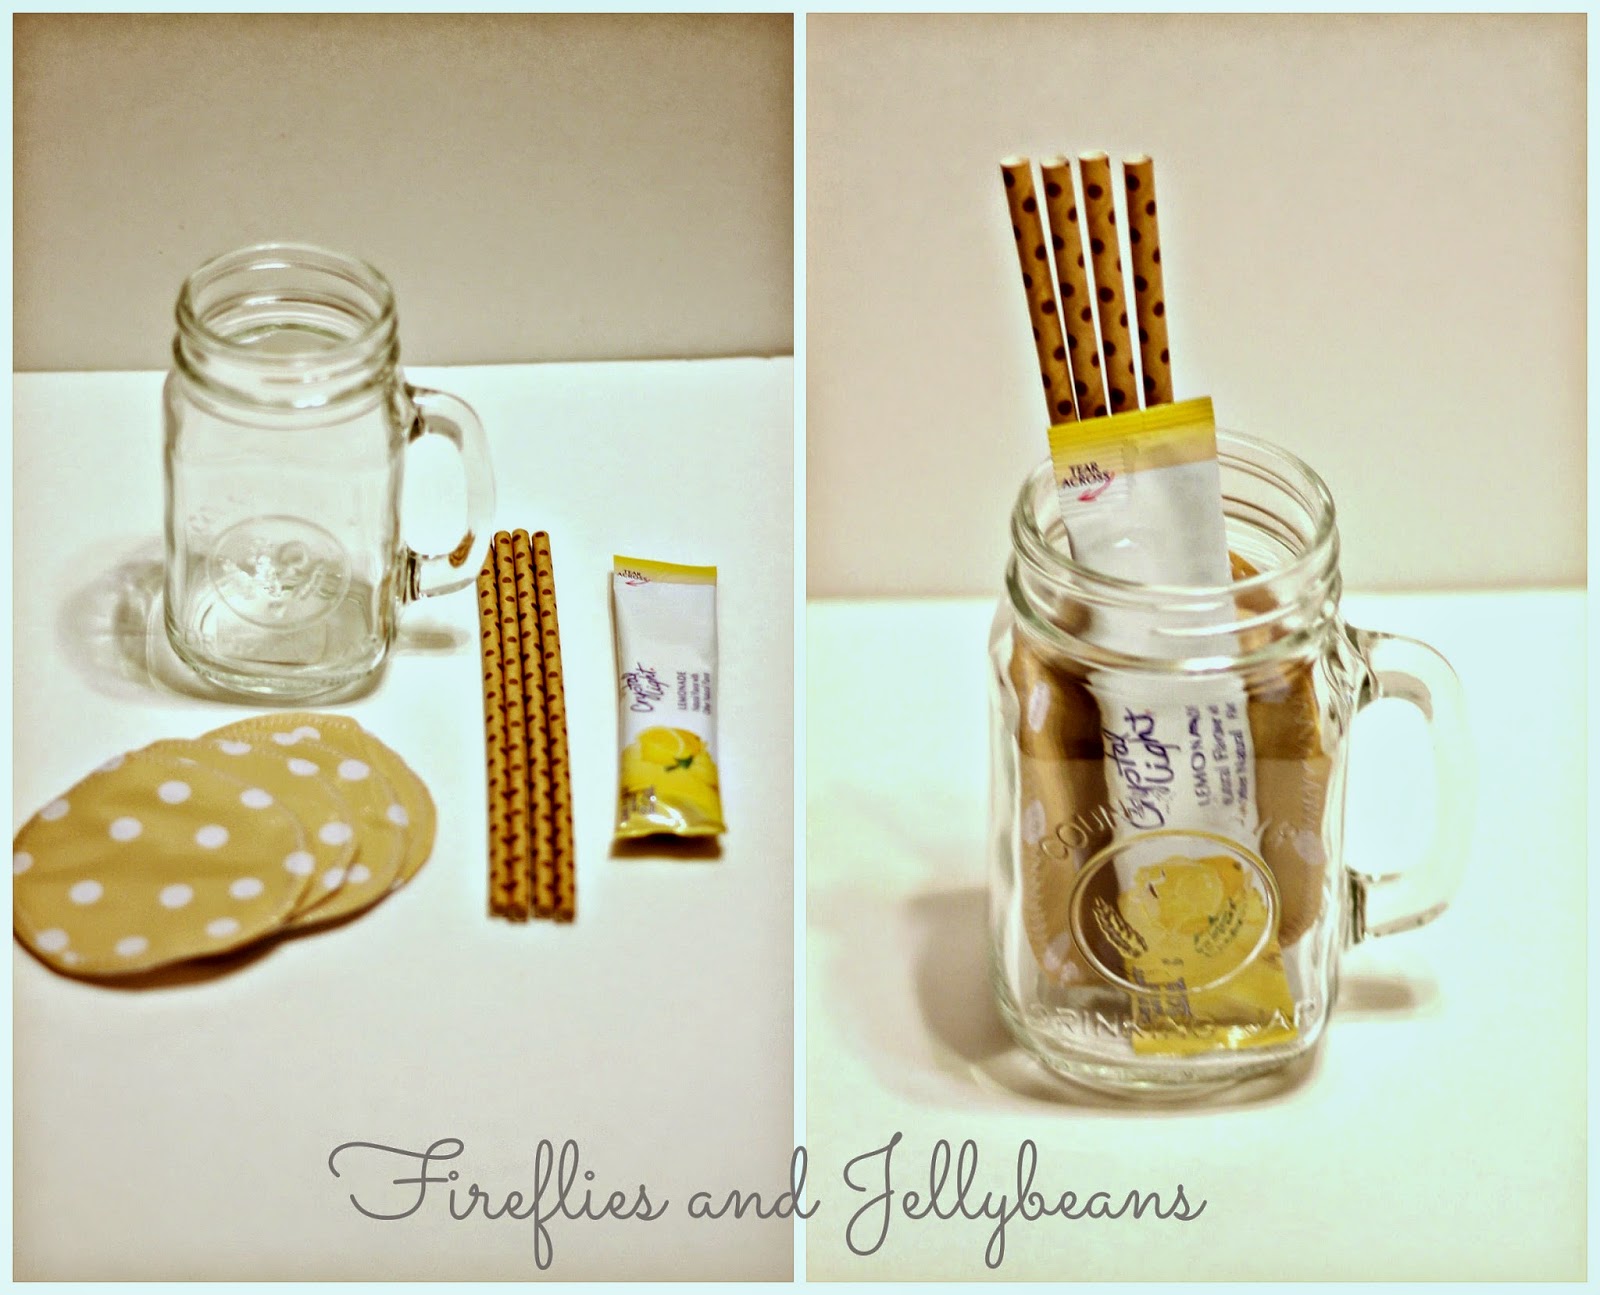
I love my kids teachers. They work hard and do a fantastic job! I am a teacher too, so I know how much they put into it. So I always like to get them something to show our appreciation. Teacher Appreciation week is May 4-8th so you have time to make this!
Here is an easy DIY for you to do to show teachers that you appreciate them. DIY Coasters paired with a cute glass, some straws and a fun beverage... to show that you know they deserve a break for all the hard work they have done. This gift uses Oil Cloth since it is water resistant. You can find it at Joann's (by the home decor fabrics- you may need to ask someone) but they have a limited selection. I got this print from Oil Cloth By the Yard. Lots of cute patterns!
Here is what you will need to do:
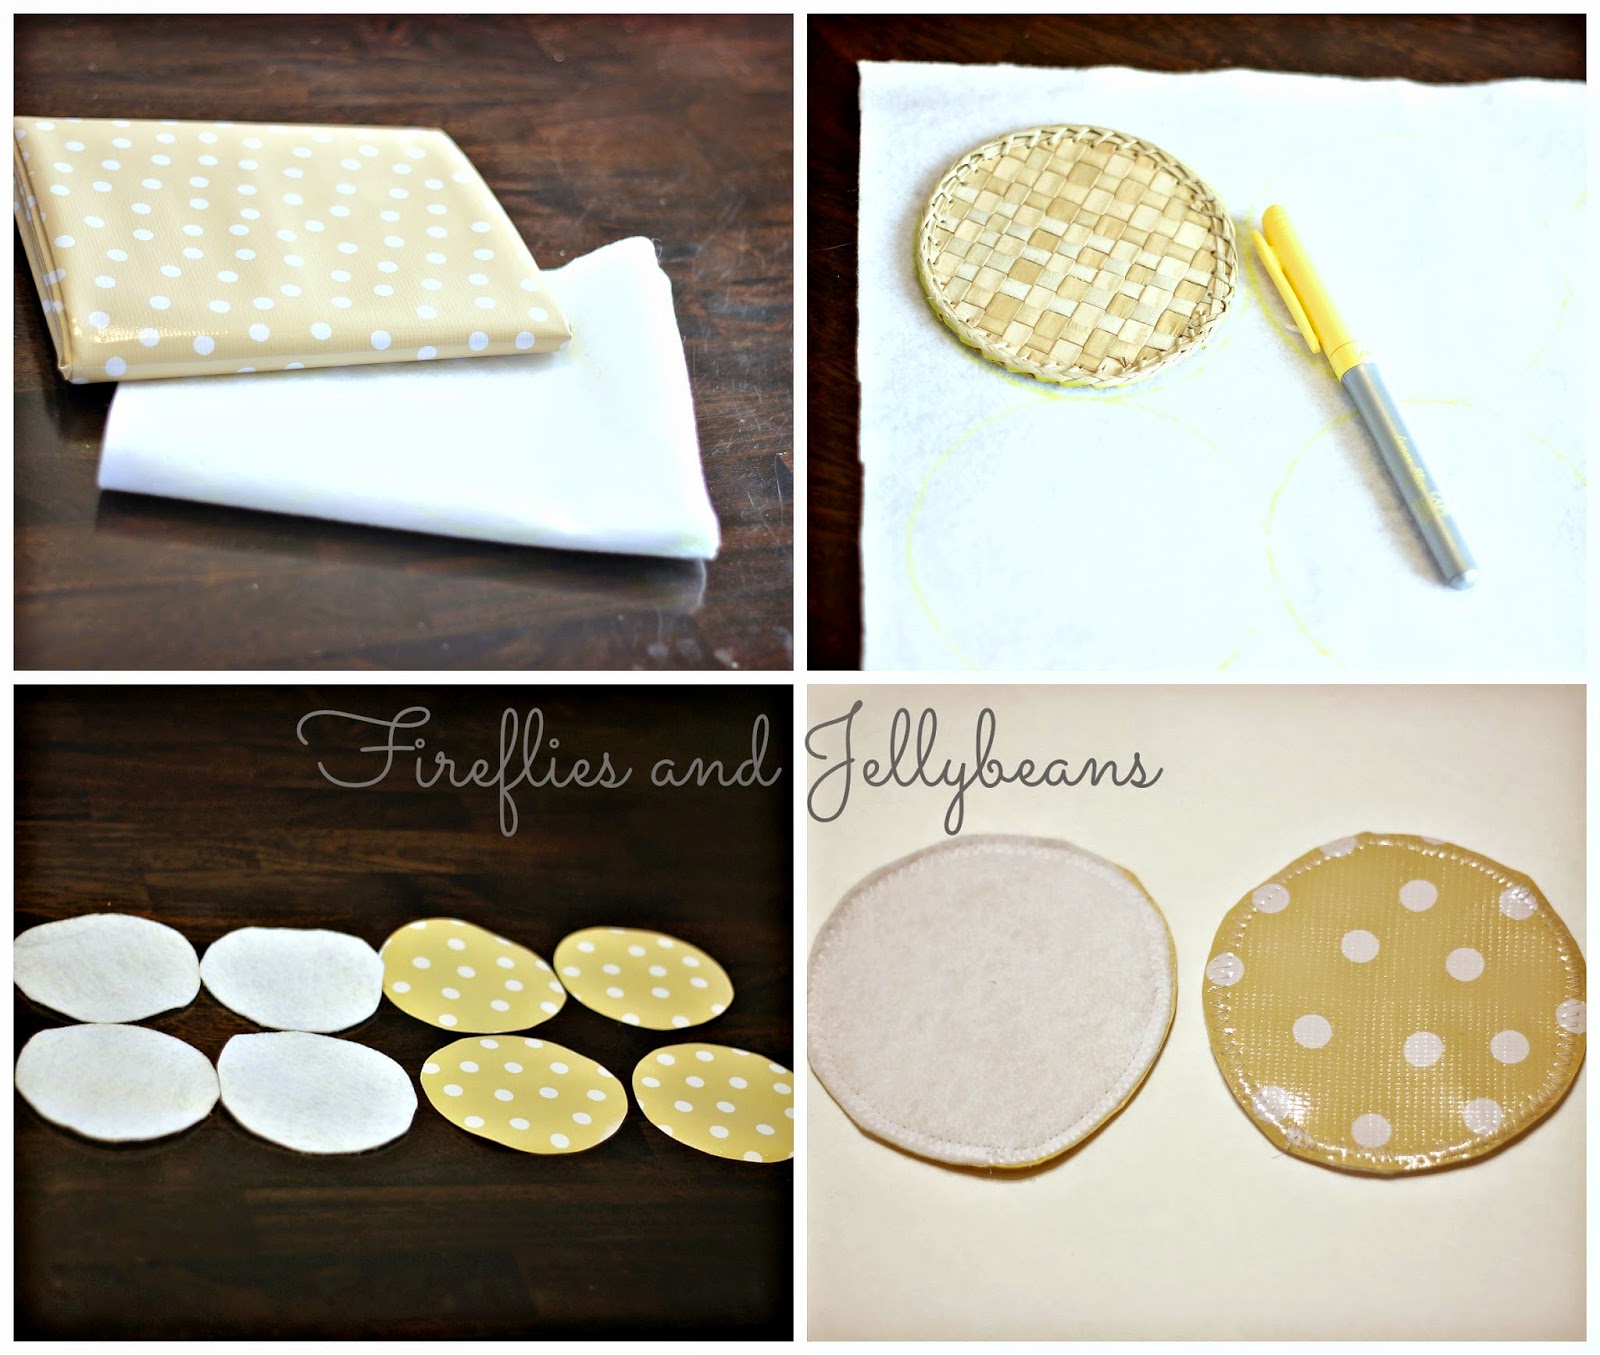
1. Gather supplies: 1/4 yard Oil Cloth, 1/4 yard Felt, Sewing machine and other sewing tools.
2. Trace out the coasters. I used a coaster I had as a template but you could also use a cup.
3. Cut out 4 of each out of the felt and the oil cloth (or more if you want).
4. Use a zigzag stitch and sew around the edge as close to the edge as you can get. Since the oil cloth and felt do not fry you can leave unfinished edges out.
And your done! I got this cute glass much from the Dollar Tree and the Paper straws from Target. I added lemonade mix to complete the gift!
Here is a printable you can add to the gift! Just right click and save the image.