Showing posts with label scrapbooking. Show all posts

Sunday, October 23, 2011

Mix and Match Alien Magnets {Tutorial AND Printables!}


Here is a fun Halloween craft!  We like Halloween around here but we do not do scary!  I am a big friady cat {Scooby Doo used to give me nightmares!} so we keep things light and fun!  Here is a perfect non-scary Halloween project with cute and silly aliens!
 
Here is what you will need:
Alien Printables (available below)
Foam Board
Scrapebook paper
Magnets
Marker/crayons/colored pencils
Mod Podge
Exato Knife/Scissors/Paper Cutter

1. Print off the Aliens.  Here are the alien printables.  Just click on the link to download. 
I drew these aliens myself... for personal use only! 

Mix and Match Aliens Printable 1
Mix and Match Aliens Printable 2
Mix and Match Aliens Printable 3
 
2. Color in your alien...I did it with marker here... however when I mod podged them later, they did bleed so I suggest using color pencils or crayons.

3. Measure off 3 inch squares {this works with the printables} on your foam board and cut it using  your Exato Knife

You will need 3 squares per alien.

4. Cut out your scrapbook paper into 4 inch squares (you want them bigger then the foam board squares so that we can cover the sides too.)

5. Trace your foam board square into the middle of the BACK SIDE of your scrapebook paper square.  then cut a slit on each corner down to where your traced the foam board.

6. Mod Podge your paper to your foam board.
A. Brush mod podge on the back side of your paper and on the foam board.
B. Place the foam board on to the middle of your scrapebook paper and fold the sides around it.
C. Cut off the extra corner pieces.
D. Mod Podge over the top of the edges on the back side to seal it.

7. Cut your alien into 3 parts: Head, Body/arms, Legs.  Use your squares to help you.

8. Mod Podge your alien to your squares.  Mod Podge over the bottom and top to seal it.

Repeat for all the aliens!

9. Attach your magnet to the backside of each square. 

Hang on your fridge and play!

Here they are all mixed up!

We even sorted them into different body parts

These would make a great little gift for your niece, nephew, grandchild, friends...etc!
Just grab a ziplock baggie, one of the printable tags below, and 3 sets of aliens.  Put the alien pieces in the bag.  Fold the tag in half and staple it to the bag.  All set for a cute non-candy, non-scary little Halloween gift!  Click on the links below for the tag printables.
Orange and Yellow Tag
Black and White Tag

Check out this cute block version I made with the same alien prinables:
It is over at the DIY Club... CLICK HERE for the full tutorial


Linking to:
Skip to my Lou Made by You Mondays
Todays Creative Blog
Home Stories A2Z

Tuesday, July 12, 2011

Giveaway {My Memories Suite Digital Scrapbooking software}

***THIS GIVEAWAY IS NOW CLOSED!!***

I am so excited to show you the  digital scrapbook software My Memories Suite I have been using!  I have been having such a blast with it!  I am not a huge digital scrapbooker so I have been using it to make cards, new blog headers and blog buttons... of course I did try out some scrapbook layouts too!That is the WONDERFUL thing about My Memories Suite... you can make photobooks, cards, calenders, blog headers/buttons and videos using this softewear!  
My Memories Suite is SUPER easy to use and they have TONS of video tutorials for you to check out to get more familiar with it too.  Check out the Tutorials HERE

My Memories also has a TON of designer Scrapbook kits to choose from and a HUGE section of FREE Scrapbook kits


Here are some of the things that I have made using My Memories Suite {and some of there FREE downloads!}.

Birthday card for my FIL 60th birthday:
I made this layout, printed it out and put it on a homemade card
{You can also make and order cards from My Memory Suite too!}  


New Blog header and button for Jeannine's Photo blog.


A cute layout of my daughters 1 year old pictures
I am thinking this would make a cute picture for her room!
{Of Course you could make a whole album and order it from My Memories too!}

I also made some new headers for F&J... come back tomorrow to VOTE on which one you like the best!

My Memories Suite is so FUN and I know that you want it too!

My Memories is giving away 1 down-loadable version of My Memories Suite to 1 lucky F&J reader!

They are also giving F&J Readers $10 off the purchase of My Memories Suite
with the code: STMMMS33197

Here is how you can enter to win:
1. You MUST be a F&J follower AND You MUST go to My Memories and pick out your favorite Scrapbook kits
2. Visit My Memories blog and leave a comment mentioning F&J
3. Like My Memories on facebook and leave a comment mentioning F&J
4. Follow My Memories on Twitter.

This giveaway will end on July 19th at Midnight.

Good Luck!!


&

Wednesday, August 4, 2010

Giveaway and an Easy Project: Mog Podge Dimensional Magic

This giveaway is now closed!

Today Plaid is letting me giveaway Mod Podge Dimensional Magic and a jar of Mod Pogde to one lucky winner!


More details about the giveaway at the bottom of the post!

Here is another easy project that you can do with Dimensional Magic!

These birthday cards are my favorite to make for kids! And since I have LOTS of nieces and nephews I make a bunch! This is always my go-to card for youngsters! It is quick, easy and personal!

Here is what you will need:
Paper- 1 plain color and one decorative
circle cutter or something circular to trace
adhesive
Dimensional Magic!
Markers
OPTIONAL: Sewing machine and thread (not pictured)

1. Cut out 2 circles from your paper. You decorative paper should be a bigger circle than your plain color. My circles are 5.5" and 4.5"

2. Write your sentiment on the plain color circle and draw an easy picture like balloons.
You can also print out your sentiment from your computer on your paper before you cut it out if you don't like your writing.

3. Adhere your plain circle to your decorative circle

4. Optional: Sew a zig-zag stitch around your smaller circle (I love the way the stitching looks!)

5. Use Dimensional Magic to highlight your features. I put it over the balloons and the letters. Let dry for 3 hours.

Here is what it looks like all done. The balloons and letters have a shiny glass like finish to it.
Here is a better shot of what it looks like.


AND NOW FOR THE GIVEAWAY!

Here is how you enter. Leave a separate comment for each one
1. Mandatory: Tell me what kind of craft you would make with Dimensional Magic!
2. Followers of F&J get and extra entry (Because we love you!)
3. Visit Paint me Plaid and tell me your favorite project.


US residents only!
Giveaway ends Tuesday 8/17/10 at midnight (CST) I will announce the winner at the top of my blog under the "Important Information" heading.
Good luck!


This post Sponsored by:

A great place for shopping finds, reading/movie lists, crafts, recipes, giveaways, daily life and much much more.

Tuesday, August 3, 2010

DIY Funky Ring with Mod Podge Dimensional Magic

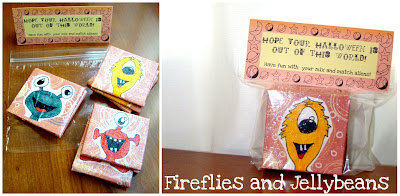
Plaid the makers of Mod Podge are teaming up with blogger all over to show case some of their products! I was so excited that they asked me to review and item for them! I jumped at the chance to try out Dimensional Magic! Dimensional Magic adds dimension and a shiny, glass-like finish to your project.

Here is the GOOD NEWS: Plaid is also giving away Dimensional Magic (plus a jar of mod podge) to one Lucky Fireflies and Jellybeans Reader! This will be happening tomorrow so be sure to come back for that!

Below is a project I made with Dimensional Magic and also a little review!

I made some rings:


Here is what you will need:
Adjustable ring blanks (found at Micheal's)
Paint
Mod Podge
Dimensional Magic
E-6000 Glues (or other strong glue)
Sand paper
Scrapbook Paper
Ink (for distressing... optional)
X-Acto Knife (or scissors)
Plate joining biscuits (found at a hardware store)


Here is what the jar looks like for the Plate Joining Biscuits

There are 100 in the jar for $6... I am going to sell sets of 10 for $1.75 if you are interested (Free shipping) See the bottom for more details!


1. Paint your biscuits front, sides and back.


2. On a piece of scrape paper trace and cut out a shape of the biscuit to make what I call a biscuit viewer. This will help you choose which part of your scrap book paper to use!


3. Use your biscuit viewer to find the perfect piece for your ring.

4. Use your X-Acto knife or scissor to cut out your pieces.

5. Using your Mod Podge paint both the top of the biscuit and the back side of your paper...

...and glue your paper to the biscuit (It is OK if you paper is a little bit bigger than the biscuit. we are going to sand that off later). Let dry.

6. Paint Mod Podge over the top of the paper to seal it. Let dry.

7. Sand the edge of your biscuit and paper to even out the edges and to distress it too.

8. Use your ink to distress the edges.

9. Use the Dimensional Magic to either go over the whole top or to high light part of the pictures.
For the green one I covered the whole thing, for the brown and teal one I highlighted the flower and on the pink one I highlighted the leaf. Let dry for 3 hours.
Here is what it looks like once it is dry... a nice shining glass like finish.

10. Now use your E-6000 glue (or other strong glue) to glue the rings to the back side of the biscuits.

OR
you could drill a hole on either end and make a bracelet...

OR
You could just drill a hole at the top for a necklace!
Review:
I really liked Dimensional Magic... I have use other products do the same type of thing but they always dried a little foggy... this did NOT! It was crystal clear! It comes in a nice bottle with a very thin tip for applying. I highly recommend it!


Linking to:

http://www.thethriftyhome.com
toolsareforwomentoo
Visit thecsiproject.com


This post Sponsored by:

A great place for shopping finds, reading/movie lists, crafts, recipes, giveaways, daily life and much much more.

Content Ad