Showing posts with label cards. Show all posts

Tuesday, March 16, 2010

How to Make an Easter Egg Card

This is a Repost of my VERY first project here on Fireflies and Jellybeans! It is a cute Easter Egg card and since I only had 2 followers (Jeannine and myself) when I posted it, I thought that you all might want to see it! : )

Here is a cute and easy card to make for Easter:
Materials:
Scissors
hole punch
Scoring tool (I use a ruler and a skewer)
Plain Card stock
Strip of decorative paper
Ribbon
Pencil
Marker


1. On the card stock draw an egg shape:
2. Cut out the egg shape

3. Place your strip of decorative paper upside down, place the egg shape on top of it and trace around the outside of the egg shape
4. Cut out on the lines that you traced on the strip of decorative paper
5. Place the strip on to your egg being careful to line up the edges
6. Use your scoring tool to score a straight line for the fold. I use a ruler and the pointed side of the skewer to make my score. Be sure to leave enough room for you to punch 2 holes on the other side.
7. Punch two holes through both layers
8. Tie a ribbon through the two holes to attaching the top paper to the bottom paper

9. Write a creative greeting on the front. I am not creative so I wrote "Hoppy Easter!"

There is lots you can do with this fun card so go out and make one! : )

I am linking to these parties!

Wednesday, May 27, 2009

How to make a Tri-fold card Tutorial and Giveaway!


It is our first giveaway here at Fireflies and Jellybeans!

We are excited and I hope you are too! Not only are we giving away some FREE cards but I will also be showing you how to make your own! What a deal!

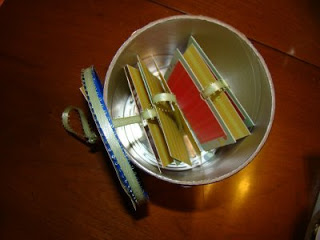
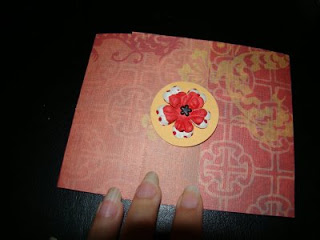
This Tri-fold card is an idea I got from my friend Amy, but she does not have a blog to show off her talents. I love it because it does not need an envelope! I have added my touch to the card and you can add yours!

Here is the tutorial (I will have the rules for the giveaway at the end of the post):
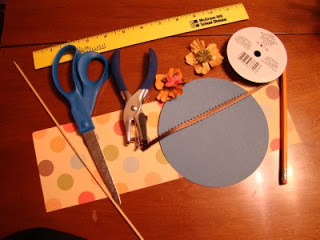
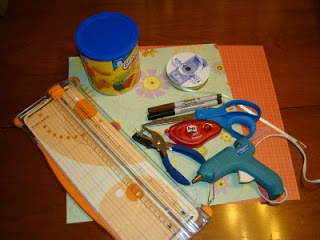
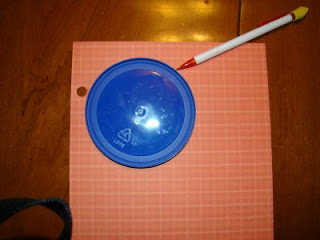
Materials :
12X12 paper
ribbon
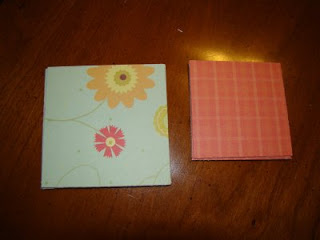
coordinating scrap paper
embellishments (I like paper flowers)
circle punch (optional)
paper cutter (optional)
scoring tool (not pictured) - I use a skewer and a ruler

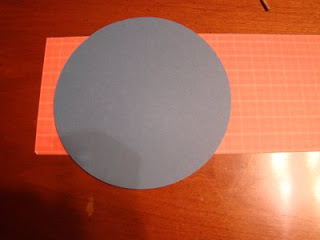
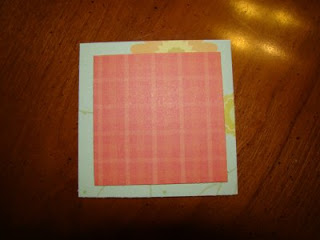
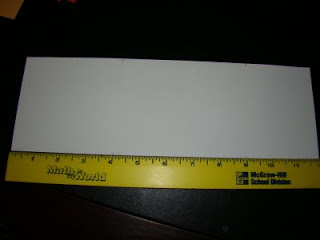
1.) Cut your paper into 12X4 strips


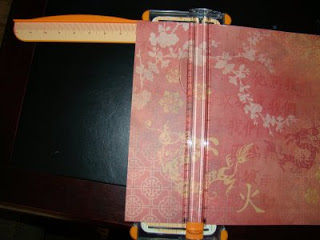
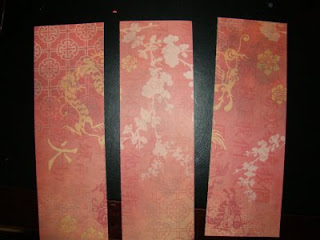
You should get 3 strips from a 12X 12 paper (great for 3 cards!)

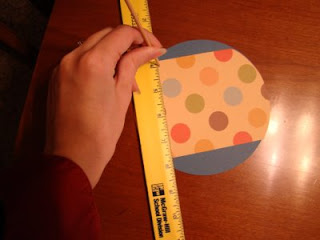
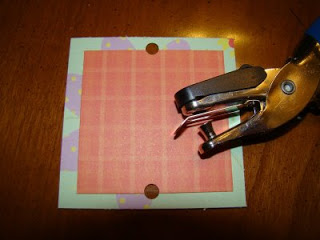
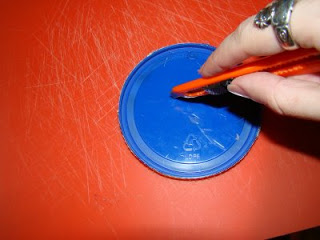
2.) Make scoring marks at 4 inches and 9 inches on the top and bottom of the paper. I make mine pretty light so I can erase them later. If you have a scoring tool you can score at 4 inches and 9 inches.
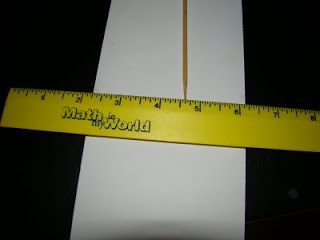
3.) Line up your ruler on your two marks at 4 inches and use the skewer to score the paper. Do the same thing at 9 inches.

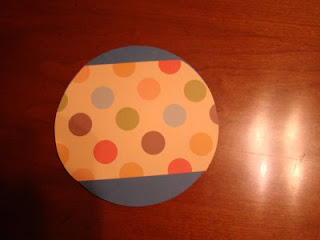
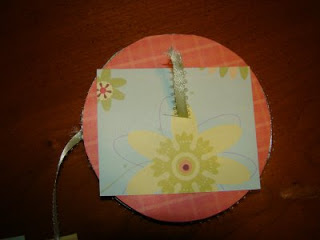
4.) Fold your paper into the middle at the scored lines
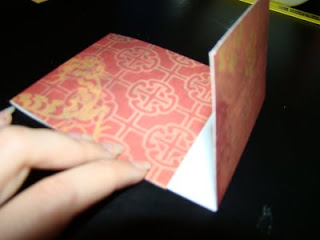
The flaps should overlap.

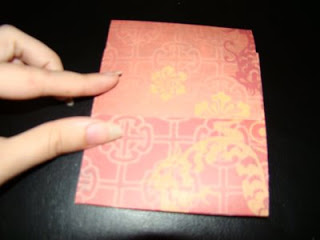
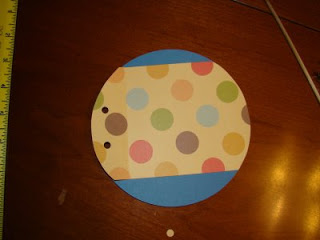
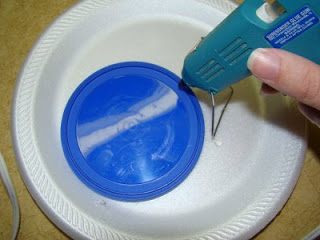
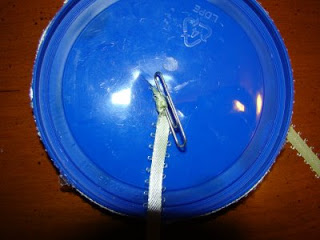
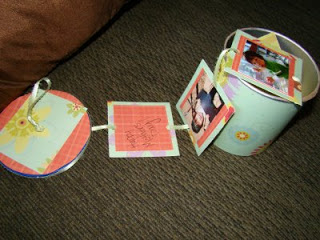
5.) Using the circle punch, punch out a circle in coordinating paper and attach your embellishment to it. Or you could stamp a monogram or picture on it too. Attach the embellished circle to the card hanging off the flap slightly


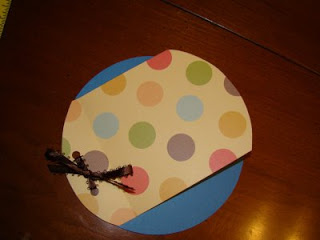
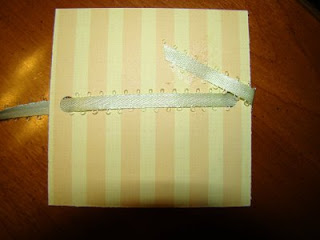
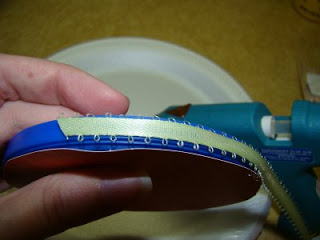
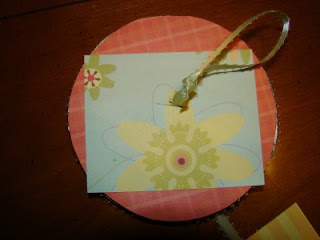
6.) Cut a piece of ribbon about 13 inches long and tie around the card to keep the flaps together.

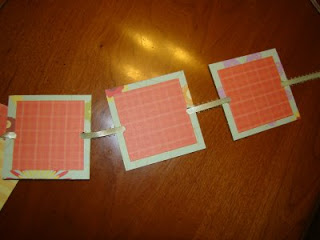
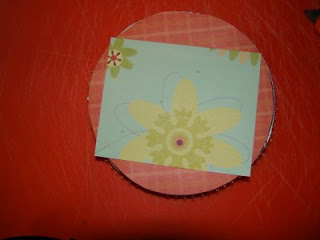
Vua-la 3 beautiful cards! They are great to use and give away as gifts, speaking of giving away...

And Now the Giveaway!
We will be giving away 6 cards: The set of 3 red-Asian themed cards above and this lovely set of 3 spring-flower cards here: I can add a monogram stamp to the outside or inside if you would like as well.
Rules:
1. We will only ship to US addresses
2. The giveaway ends on May 31st at 9 PM Central Standard Time at that time I will use a random number generator to choose the winner.
If you have a blog I will leave a comment that you won, if your blog is privet or you do not have a blog leave a way for me to contact you if your e-mail is not available from your profile.
3. We will mail the cards out by June 3rd
Enough rules... here is how you Enter! You can get up to 6 entries!
Leave a comment for each entry:
1. Leave a comment about what your favorite homemade gift to give is.
2. Become a follower of our blog
3. Blog about this giveaway (leave a comment with the link)
4. Facebook this giveaway (leave a comment with the link)
5. Tweet the giveaway (leave a comment with the link)
6. Grab our button for your blog
Good Luck!!

Monday, May 25, 2009

How to Make a Graduation Card-in-a-Can


What do Grads want? Cash or gift cards! Here is a fun way to dress-up giving them a gift card.

It is similar to my Mother's day card-in-a-can. But I wrote "Congrats on graduating" and I did not add any photos and tied a gift card to the bottom of the ribbon. I like to use scrapbook paper that has the school colors in it!


For the full tutorial go HERE

Tuesday, May 19, 2009

How to Make a Father's day Story Card


This is my husband's first father's day. So I wanted to make him something special. Our journey to parenthood was not the easiest and we adopted our son a little over 6 months ago. It has been wonderful to be parents.

This Father's day book tells the story of how my husband became a dad. Each page is in the shape of the letters spelling out f-a-t-h-e-r and all the lines of text on the pages start with the letter (Ex- the page that is in the shape of the "f" all the lines of text start with "f"). I also thought of writing down traits that start with the letters as well, but got excited about making the story.

Materials:
Paper
scissors
small box (to wrap it in)
adhesive
photos
ribbon (not pictured)
Markers (pictured but I didn't end up using them)

the brads and the skewer and the ruler are also in the picture but I did not use them... in the original plan I was going to but went a different direction and didn't want to take another picture... you get the point!


1.) Trace around your box 6 times (one for each letter). This will make sure that it will fit in the box when you are done.


2.) on the back side of the paper draw out your letter... be sure to draw it backwards since it is the back side. I wanted mine to be big and block-y


3.) Decide what you want your pages to say. If you are going to write a story or the attributes. I printed mine off on the computer using some fun fonts. I cut the writings out for each page.


Here is what each page says:

F

Far away in Korea a little boy waits for his parents

Far away two parents wait in America for a child


A

A lot of waiting

A lot of prayer

A lot of trust in God brought this family together through

Adoption


T

Traveling to Korea so that we could all be

Together

H

Home at last on Nov 5th

Here to stay is our son


E

Everything Changes

Excited to be a family

Exhausted from lack of sleep


R

Rightfully matched together

Raising a son takes a lot of

Responsibility

4.) I like to antique the edges on the paper to make them not so sharp. I use a brown ink and rub just the edges and the corners on the ink. It is a nice touch.


5.) Attach your text to your pages

6.) Punch holes and attach your photos


7.) Tie your ribbon through your book:


8.) Decorate your box and place your book inside! I used tissue paper, and extra paper scarps and Mod Podge (to attach). I wrote "Happy Father's Day" with a Sharpie

I hope that you have a great Father's day!

Tuesday, May 12, 2009

How to Make a Cute Circle Card

The Math person in me wants to call this C^3 (c- cubed) but I will resist!

This card is great for Thank yous, Birthdays, Notes... anything!

Here is what you need to make this cute card:

Materials:
strip of Decortive paper
cut out circle (mine is from Yours Truly from Archiver's but you could trace and cut out one or use a circle cutter too)
score tool (I use a skewer stick and a ruler)
Hole punch
Scissors
Pencil
Ribbon
Embellishments (I am using paper flowers)


1.Turn your strip of paper upside down and place your circle on top where you want it to cover


2. Trace around the edge of the circle and cut out, turn over and place on top of the circle


3. Now we are going to score the top paper so that it opens nicely. I use a ruler and a skewer. I place the ruler where I want the fold and run the skewer (pointy side down) along the edge of the ruler for a straight line. If you have something better than that- use that! Make sure you leave enough room to punch the holes on the other side of the fold!


4. Make sure your paper is lined up on your circle and punch 2 holes though both layers


5. tie a ribbon through the holes to attach the paper


6. Add any embellishments and writing that you would like to the card, or you can leave it plain too!

I hope you enjoy making this cute circle card!!

Tuesday, April 28, 2009

How to Make a Picture Card in Can- perfect for mother's day!

THE BEST OF 2009!

This Card in Can is on of my MOST popular tutorials of 2009! 


This was a fun project to make! It is going to be my mother's day cards for my mom and my MIL. I am pretty sure that they are going to like it since it has pictures of their grandchild in it! It also reuses a "can" that I would have otherwise thrown away so it is also green!


Materials:
a tin can (Peanut can would work, I used a Gerber lil' crunches can since my son LOVES to eat them!)
decorative paper
ribbon
Scissors and slider cutter
Hole punch
X-acto knife
adhesive (I used double stick tape and Hot Glue)
Markers
Paper clip
Photos


1. Clean out your can.

2. Cut out squares to fit into your can. I cut two sizes. 3' squares and 2 1/2' squares to make the framed edge. It will depend on your can how big your squares can be. suggest trying a size on the bigger side and than you can trim off if you have to. It is easy to cut off than it is to add more on. I also though circles would be cute but I don't have a circle cutter. I make sets of squares. You can make as many or few as you have pictures for. 8 fits into my can nicely and doesn't make too long of a string to pull out.


3. Attach your smaller square onto your bigger square.


4. Punch a hole on the top and the bottom of your squares:

5. tread the ribbon through your squares.


6. At the bottom attach the ribbon to the back to "tie off" the end. Set your square garland to the side for a bit.
7. Now we are going to cover the can. Mark on your paper how tall your can is and cut a strip that is that height.
8. Attach your paper strip to your can. (I used hot glue for this) My strip does not reach all the way around so I need to add another little strip to cover the rest up.


I choose to use the coordinating paper to make the extra strip and I think I am going write "Grandma" on the side.


9. Now the cover: Trace around your cover and cut out the circle.
10. Using hot glue attach your paper circle to the lid.
11. Also using hot glue attach the ribbon around the edge to the lid.

I added a rectangle on the top of my lid. You don't have to.


12. Using an X-acto Knife cut a slit into your lid big enough to slide your ribbon through. Be sure to cut on a safe place and to go through all the paper layers.
13. Before you thread you ribbon from your square garland through your slit you will want to tie a paper clip on to act as a stopper.

14. thread your ribbon through the slit.

15. Make a loop and tie a knot.
16. Add your photos to your square garland. I printed my as wallets (also had to crop some off to make it fit on my squares). I printed 6 pictures and on the top square ( the first one you will see) I wrote "Happy Mothers Day!" and on the bottom one I signed "From our Family." Zig-zag your garland so that it will pull out of the can nicely and put on the lid.
How cute is that???

I also made one for my BIL birthday. He loves to fish so I cut out fish shapes and made a Stinger of fish come out. I made the can look like a net. At the bottom of the stinger I tied on a gift card to one of his favorite sporting good stores! Here is a pic of that:


Content Ad