Showing posts with label felt projects. Show all posts

Tuesday, September 23, 2014

Felt Pumpkin Funny Faces (15 minute Halloween craft) ~Tutorial~

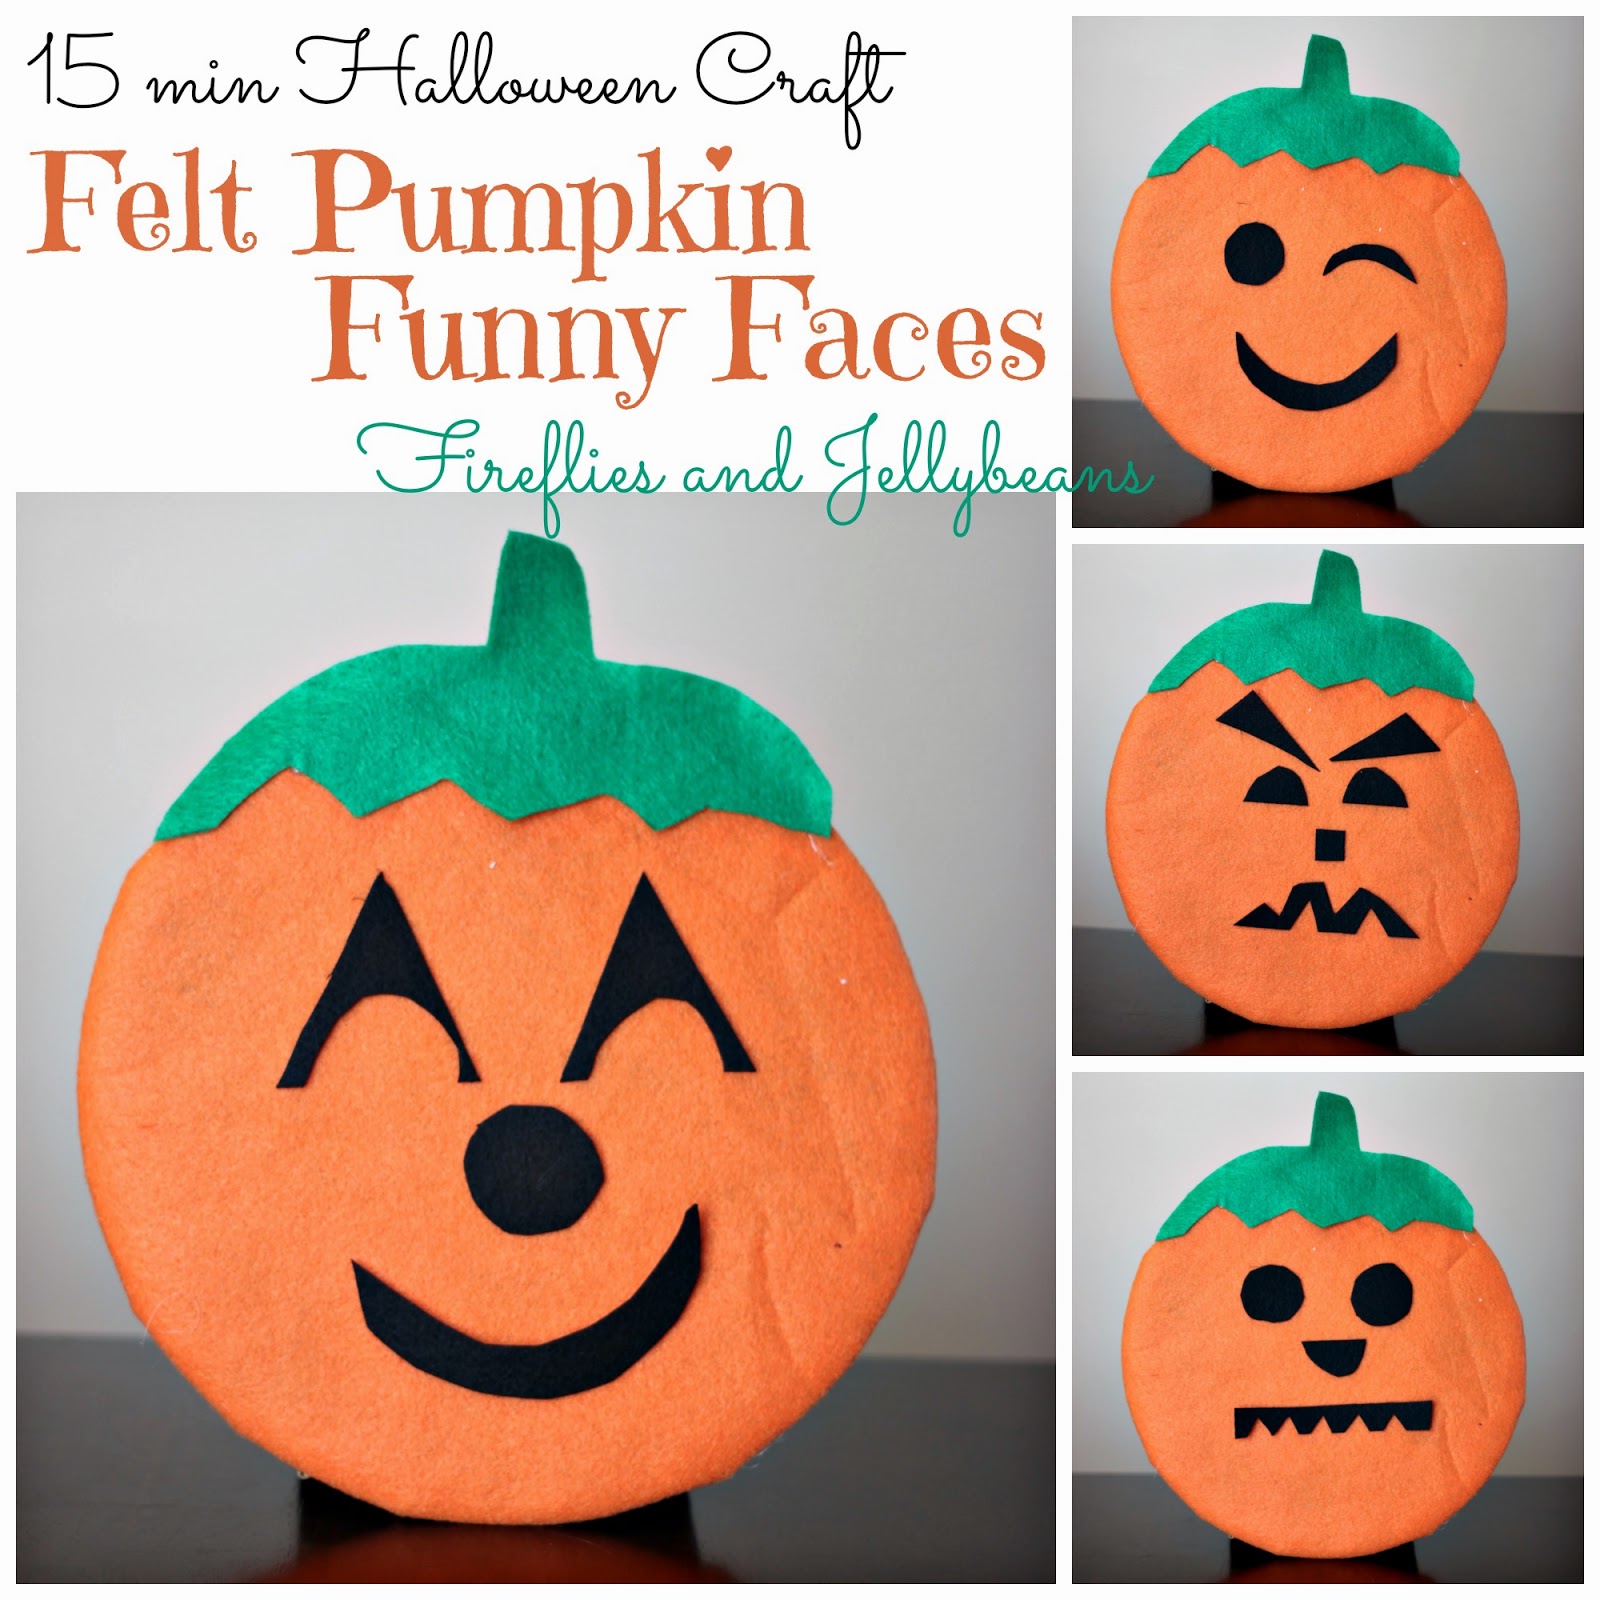
Here is a great Halloween craft that you can do in 15 minutes!  And it works as both Halloween decor AND a toy!  Great for the kiddos!  My Kids love the Funny Faces magnet toys and I knew that they would love this too! 

Here is what you will need: 
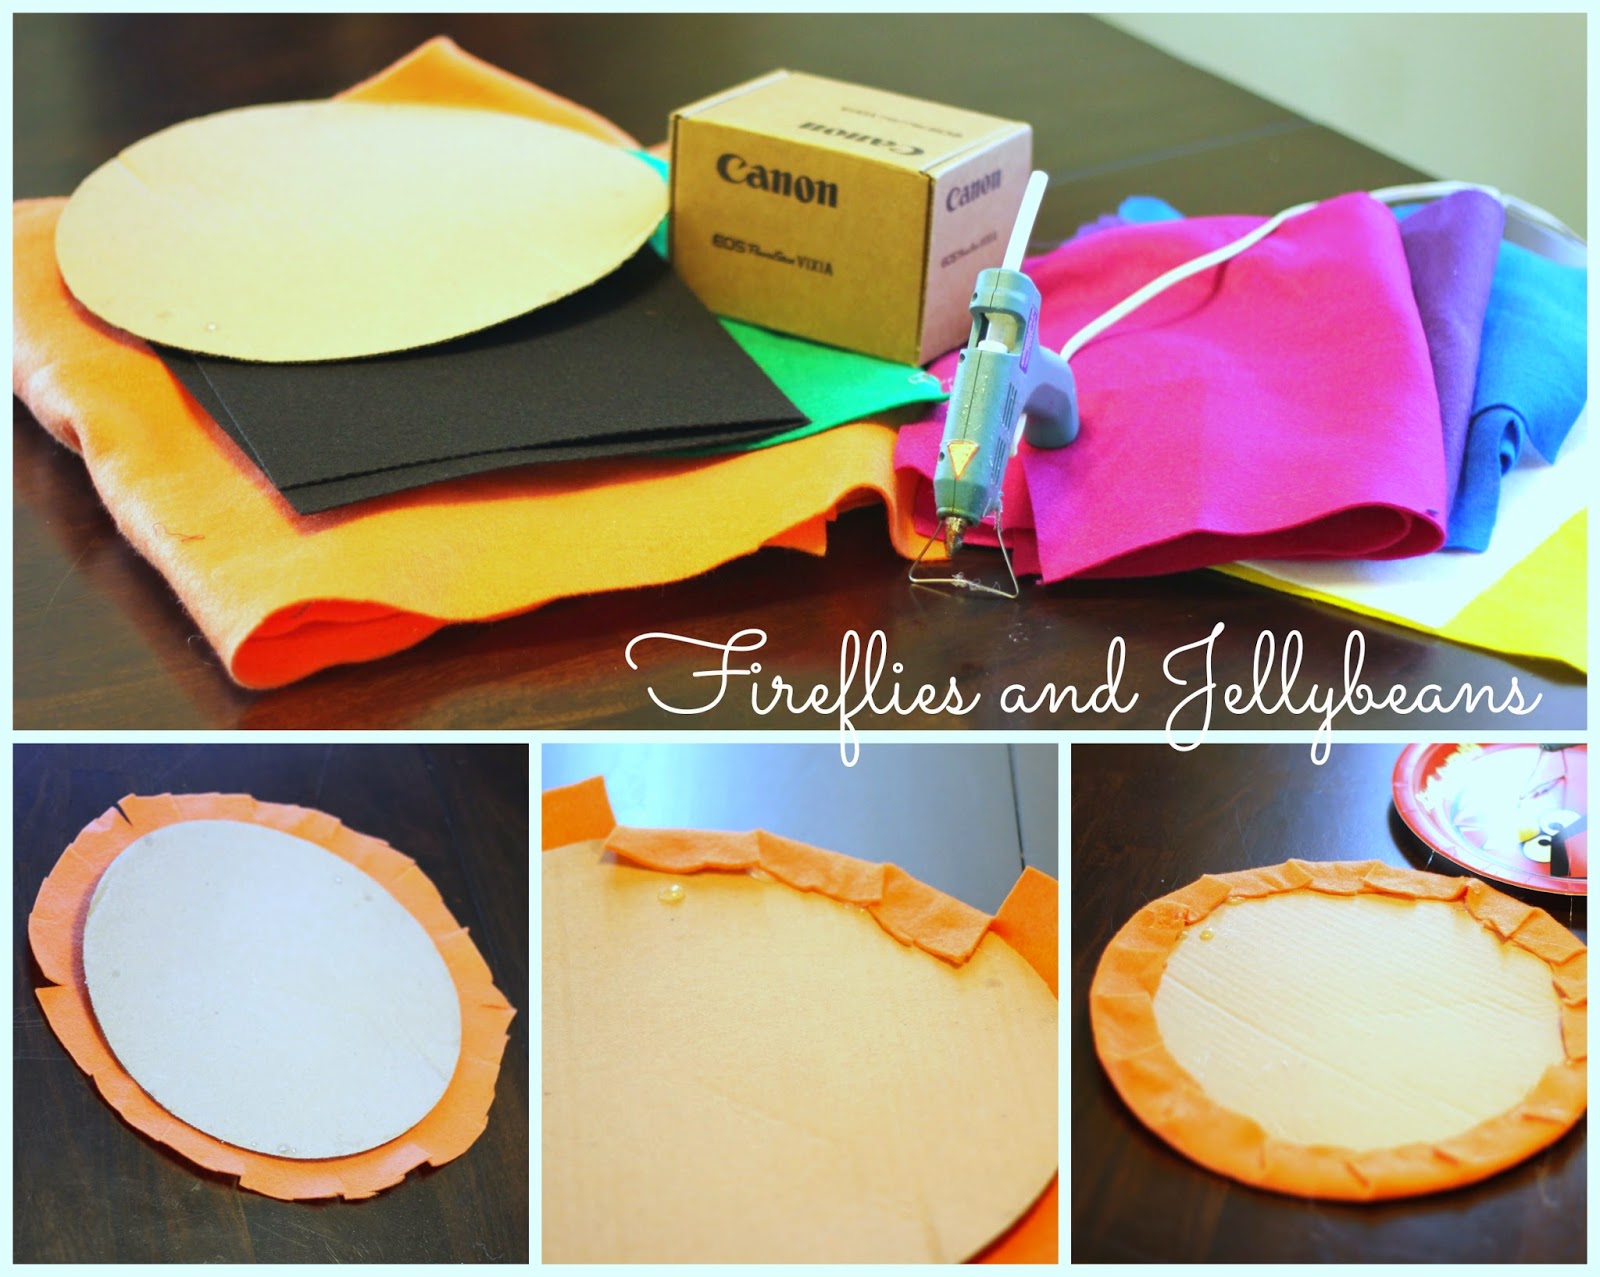
Circle cardboard (We got ours from our Frozen Pizza)
Felt (In a verity of colors but mostly orange, green and black)
Small box
Hot Glue

1. Cut your orange felt circle a little larger then the cardboard circle.  Cut small slits around the circle (about every inch or so)
2. Hot glue the orange felt to the cardboard circle overlapping the slits. 

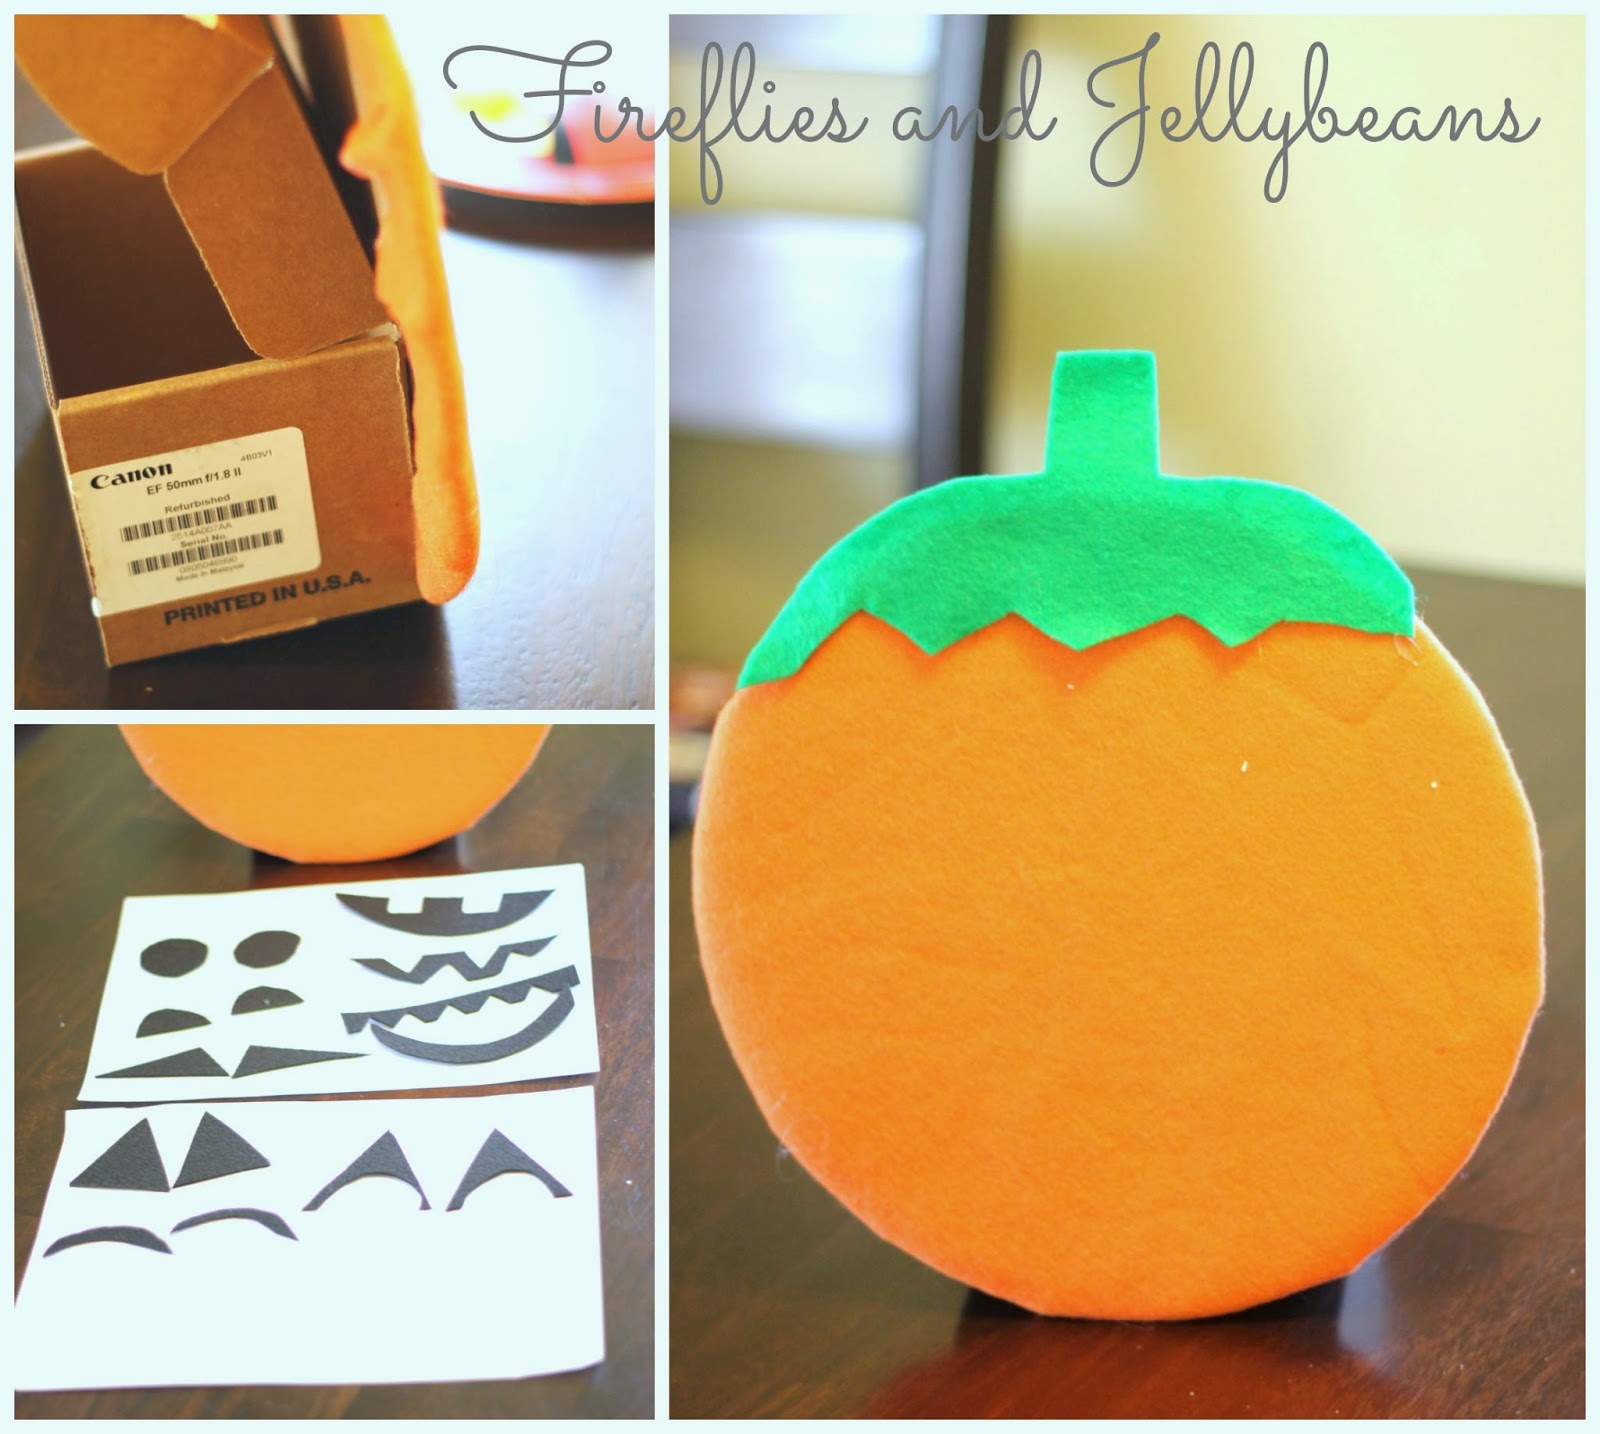
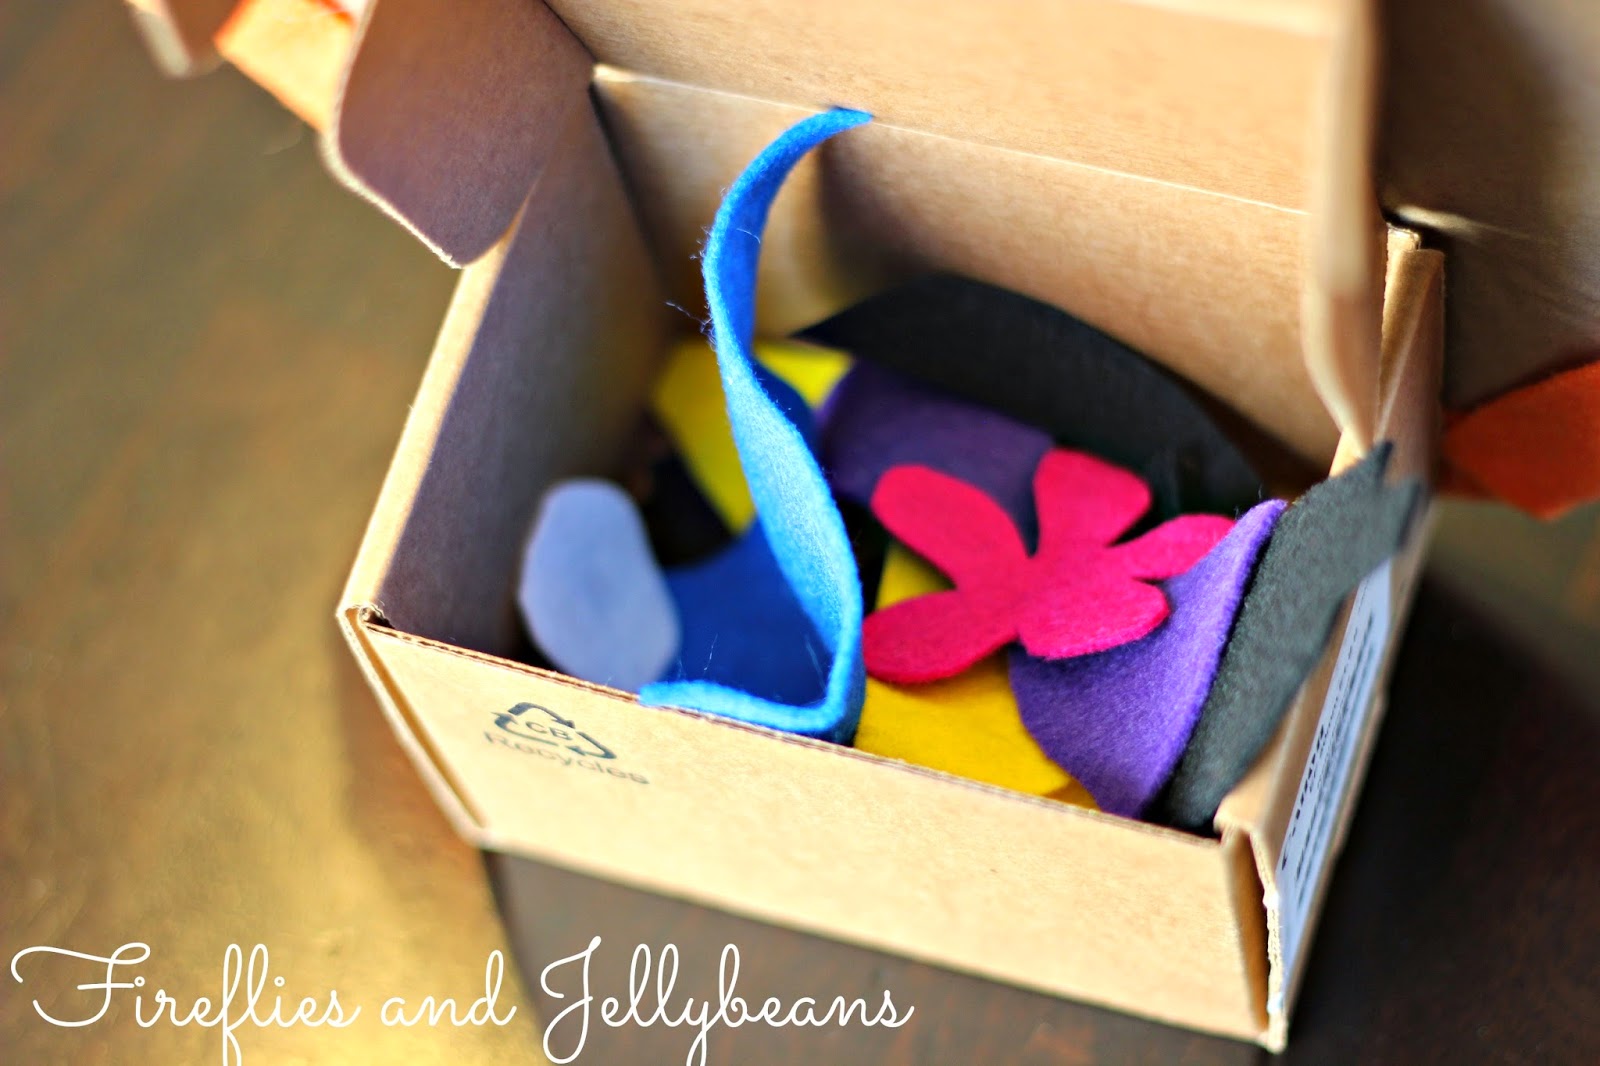
3. Hot glue the small box to the back of the circle.  This makes it stand up and also provides a place for all the face shapes to go.
4. Cut out a steam shape from the green felt and hot glue it to the top.
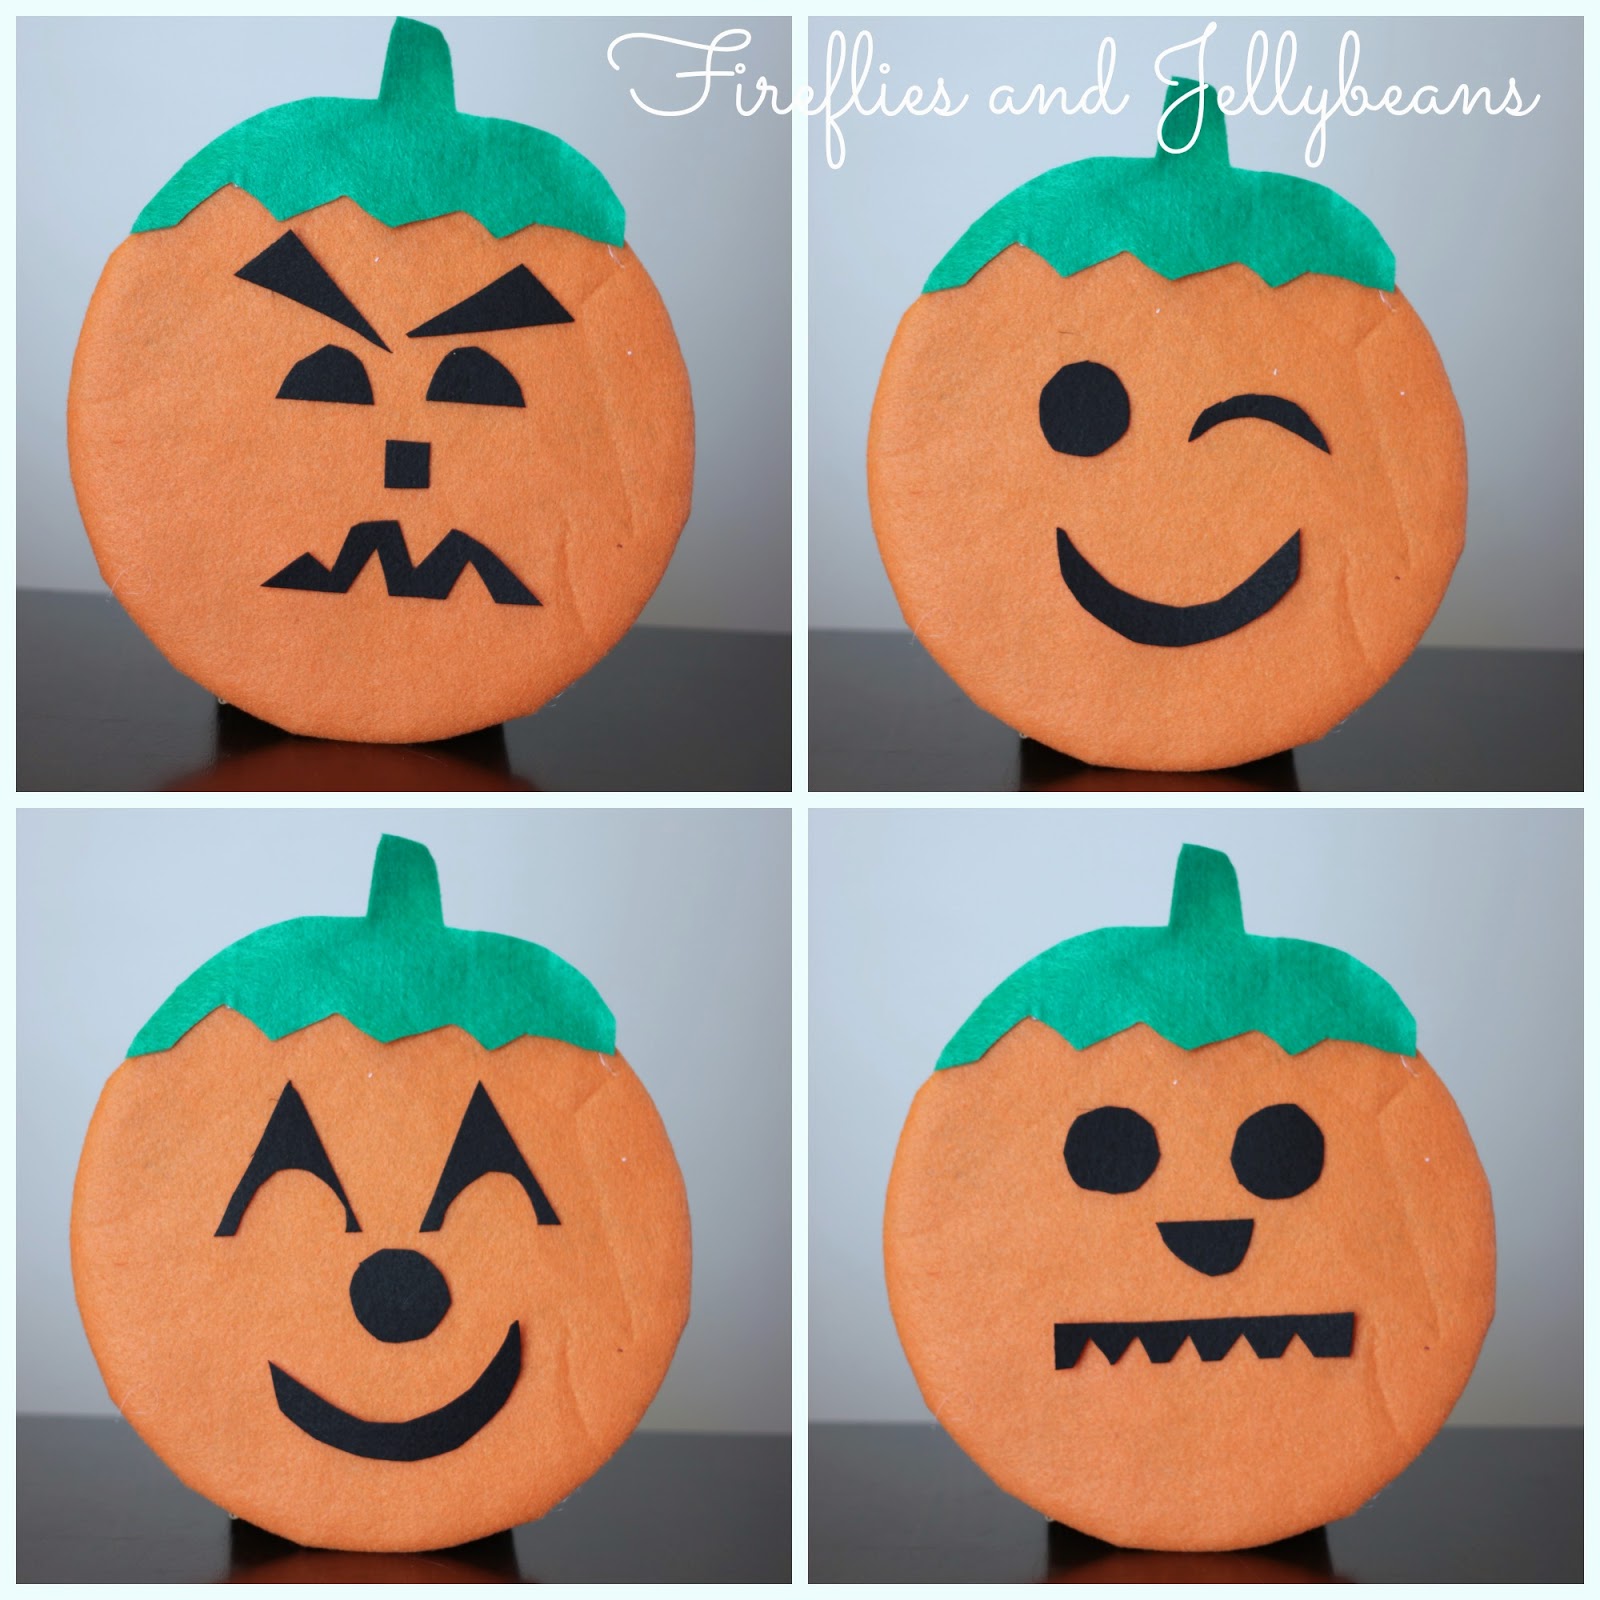
5. Cut out simple shapes for the pumpkins eyes, mouth, nose, eyebrows, etc.  Keep the shapes super simple like you would see on a pumpkin face.

Test it out to make sure it works. ; ) 

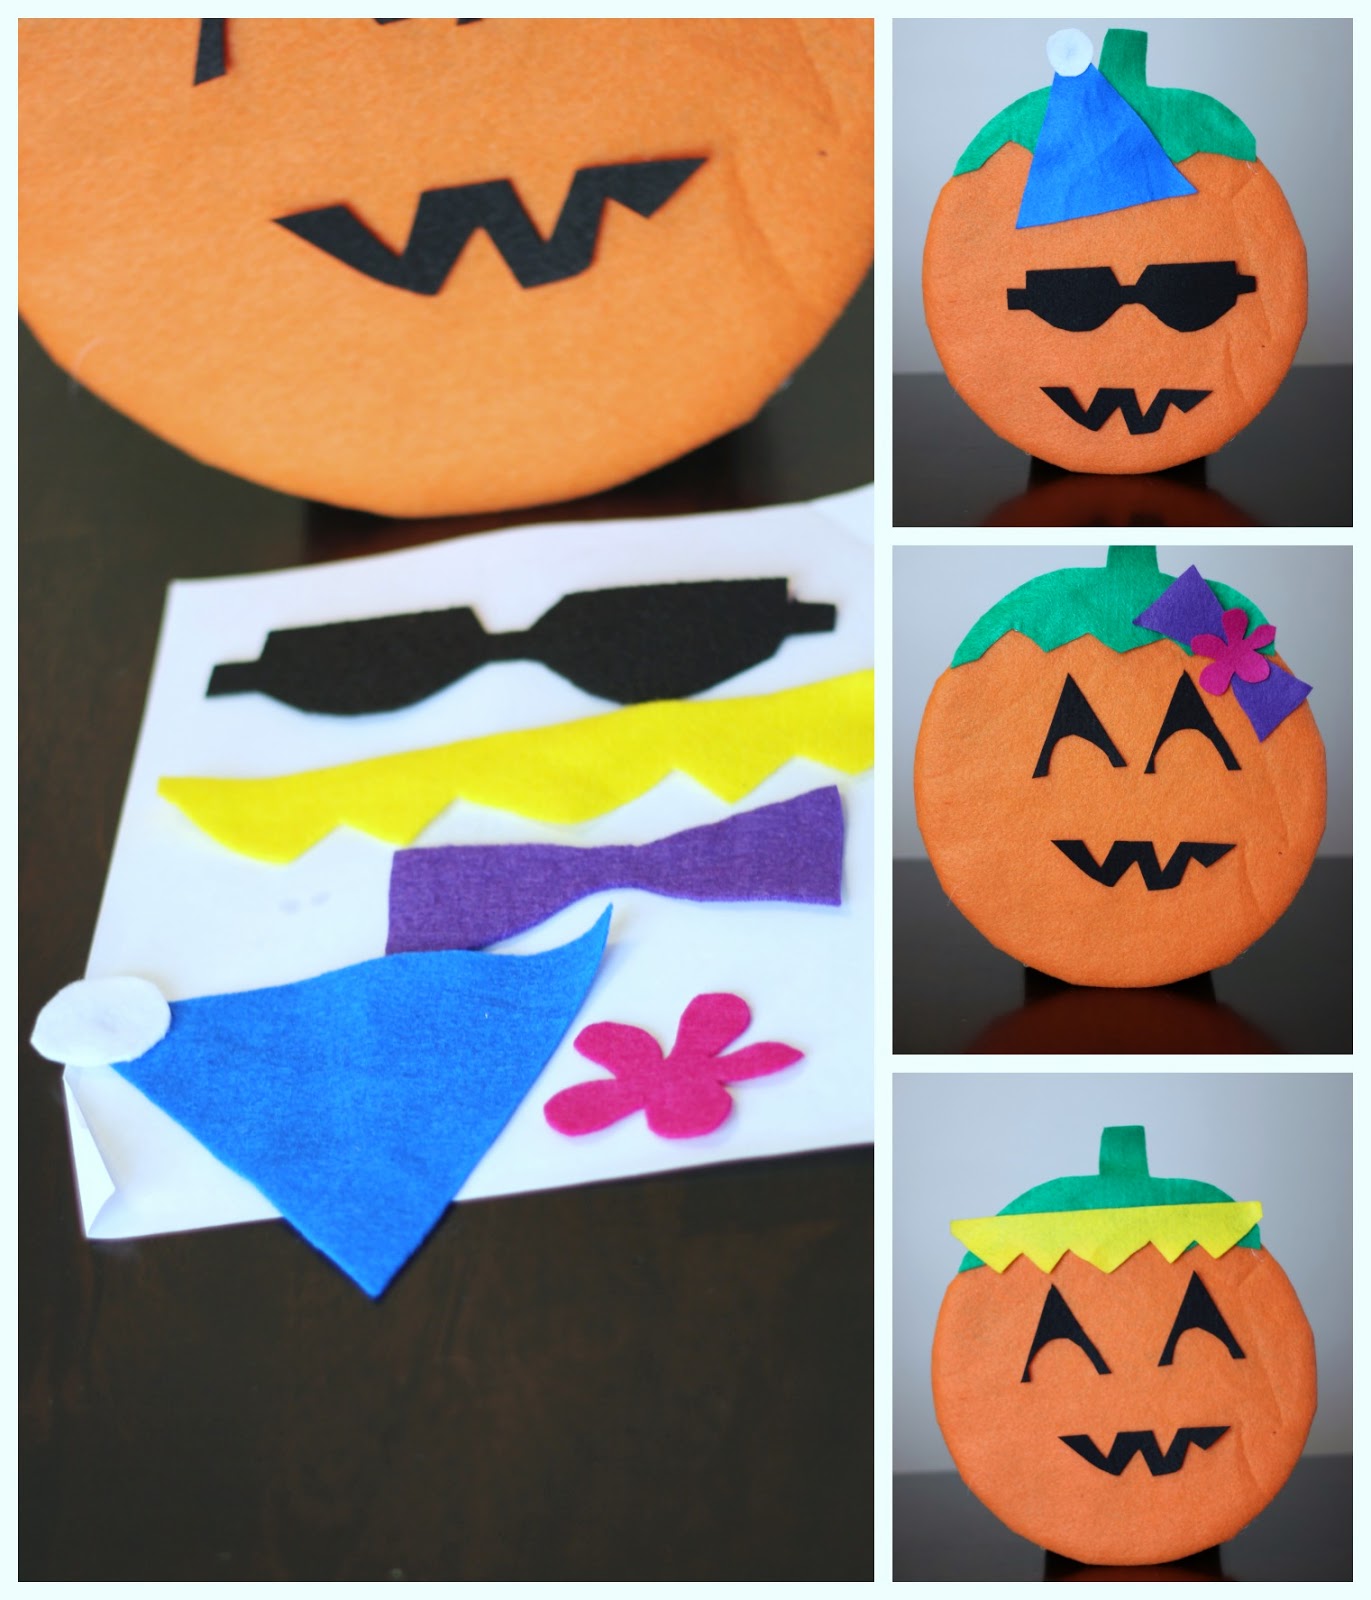
If you really feel crazy you can add some accessories!  I added a hat, sunglasses, bow, flower and blond hair. 

And when you are done all the felt pieces can go right into the box! 

Joining in the fun with:

Friday, May 23, 2014

3 Easy DIY 5 Minute Hair Clips {Tutorial}

Who's ready for some quick crafting?  You can make each of these hair clip is 5 minutes!  AND no sewing!  So easy- you gotta try it! 

First up - The Triple Rosette Hair Clip

You will need: Small felt peices, Hair Clip, Glue Gun, and Scissors
1. Cut out 3 different sized circles the smallest being about 1.5 inches in diameter.  The bigger the circle the bigger the rosette.
2. Cut a spiral into the circle
3. Start at the beginning of the spiral and roll it.
4. keep rolling until you get to the end
5. Use Hot glue to glue the end onto the bottom to hold the rosette together
6. Make 2 more and hot glue them to another piece of felt.  Trim around the edges.
7. place a small piece of felt in the clip and hot Glue around it. 
8. Glue to the bottom of the rosettes.
Supplies used:


Next up is the Double Pom-Pom Hair Clip

You will need: Yarn, Small felt pieces, Hair Clip, Fork, Hot Glue, Scissors
1. Wrap your yarn around the fork several times.  The more you wrap it the thicker your pom-pom will be.
2. Cut off a separate piece of yarn, tread it through the middle spoke of the fork, and tie a tight double knot,
3. Carefully cut all the loops on both sides (but on the thread that you used to tie it all together)
4. Trim any yarn pieces that are too long.
5. Make another one and hot glue them to a small piece of felt. 
6. place a small piece of felt in the clip and hot Glue around it. 
7. Glue to the bottom of the pom-pom.
Supplies Used:


Third up is the Silk/Felt Flower Hair Clip:

You will need: Silk Flower (think $1 store), Small felt pieces, Hair clip, Hot glue, Scissor
1. Take apart your silk flowers so you just have the silk parts and not the plastic parts. 
2. Cut a piece of felt about 1"X8" and cut fringes into it.  Glue a line of hot glue and roll it up over the glue.
3. Line up your 3 pieces: Leaf - silk flowers - felt flower
4. Hot glue the silk flowers to the leaf.
5. Hot glue the felt flower to the silk flower.
6. place a small piece of felt in the clip and hot Glue around it. 
7. Glue to the bottom of the flower.
Supplies used: 


Make a bunch! 

This post is part of:

Wednesday, April 30, 2014

Easy DIY Princess Dress-up Aprons Tutorial {remixed}

I have made Dress-up Princess Aprons for years now.  But I have decided to remix the tutorial a little bit and show you how easy it is to alter it to make it what ever princess you want!   


Here is how you make this version:

You will need:
2 colors of Felt
1/4 inch Elastic
Sewing machine with sewing tools: scissors, thread, needle etc

1. Cut the different pieces:
8X8 inch square
2X42 inch strip
Two 16X28 inch rectangles (one in each color) 

2. Take the top color, fold in half the long way, and cut out a rounded triangle shape.  Open it up and place it on top of the bottom color and place the strip on top of that and sew across the top and down the sides.

3. Take the square and fold it in half and cut out a heart shape top.  Open it up and place it right sides together on to the top of the strip- make sure to line it up in the middle. 
4. Cut a 10-12 inch strip of elastic and sew it to the top back side of the the heart shape neckline.  

Too cute! 

I made a bunch of them for my daughter's Princess Birthday Party (Post coming soon!) 
Honestly- how cute is this picture?!  

Here are other Princess Aprons I have made... as you can see you can change or add your own spin onto it! 


Monday, April 7, 2014

Batman Hoodie DIY {#SuperHeroing, #CerealHeros)

This article is sponsored by General Mills
We have been #SuperHeroing with our favorite Big G cereals!  Now, through April Select Big G Cereals have FREE Justice League Comic books inside, plus fun Super Hero Accessories on the back of the box.

Today I am going to show you how to make an awesome Batman Hoodie! 

Tuesday, February 18, 2014

Angry Birds Hoodie DIY

My oldest son turned 6 last week.  6!  I mean where did my baby go?!  
He is totally into Angry Birds (like most boys his age!)  So I set out to get him an Angry Birds hoodie... and they don't really have them like I wanted (with the bird face on the hood)  so I made one and now I am sharing it with you! 

Sunday, June 23, 2013

Kids DIY Monster Puppets

Thank you to Michael's Craft Stores for sponsoring this post! 

It is summer and it is that time of year when we hear "I'm bored!" too often!  Here is a fun kids craft that create a puppet that will entertain them even after they make it! 

Here is what you will need:
Felt Sheets
Scissors
glue
 (I found that hot glue worked the best for the eyes and craft glue worked great for the rest)
Googley eyes
Other fun craft items (fuzzy balls, feathers, markers... what ever you got!)

To start off with I had my son draw a monster that he wanted the puppet look like.

1. Cut the puppet shape out of 2 pieces of felt.  Make sure that it is big enough for a hand to fit in.
2. Add your googly eyes.  I found that the craft glue did not stick to the plastic eyes so I used hot glue that worked.
3.  Add any other embellishments.
4. Sew around the outside of the puppet leaving the bottom open for a hand to fit in. 

My son had a blast making his.  He was very serious about where he placed things.

Here are all of our monster creations!  

The kids loved playing with them too! 

This kid's craft project is part of Michael's Craft Stores' Summer Adventure program!  It is all about unplugging and creating some fun summer memories!

Disclaimer: Michael's provided a gift card for the craft supplies... all my opinions are 100% mine! 

Tuesday, February 14, 2012

Princess Dress-up Apron {Tutorial!}

Happy Valentines Day!
We love our readers and are so thankful that you choose to spend your time with us!

I have had this project in my head for months now.  My niece's Birthday is next week, and it was a perfect excuse to finally make it!  I wanted to make durable dress up clothes and are also easy to get on and off...

And the Princess Dress up Apron was born!

Easy to slip over you head and it ties in the back.  No buttons or Velcro! The felt makes it easy to sew and more durable then most of the flimsy dress up clothes fabric.

This size is for 4T- Girls Small.   I think it would fit 4 -6 year olds.

Here is what you will need:
Felt (About 1/2 yard total...divided up by what princess colors you want)
1/2 inch thick elastic (not pictured)
Sewing Machine (with thread, scissor, etc)

1. Cut out your 3 pieces:
Top square is 8" X 8 " (blue)
Middle Strip is 2" X 48" (red) {If you have to, you can piece it together like I did}
Bottom rectangle is 11" X  28" (Yellow)


2. To give your top piece a "sweet hear neckline", you just fold in half and cut a curve on the top.  It is just like you are going to cut out a heart but with out the point on the bottom.

3. Add 2 pleats to the bottom piece.  
I marked the middle with a pin.  I then measured 3 inches from each side of the middle pin and folded over and pined the fabric into itself.  Then, I stitched the pleat in place with a straight stitch in my sewing machine.

4. Sewing the whole thing together.
A. Pin your long strip to the bottom rectangle lining up the middle each with right sides together.  You want an equal amount of tie hanging off each side.
B. Sew together getting as close to the edge as possible.
C. Pin the top Square (on the straight side) lining up the middles of each piece to the top of the strip you just have sewn (right sides together)  Sew together as close to the edge as possible.
D. Optional: Top stitch on the right side of each seam to give it a finished look.

5. Cut a piece of elastic that will fit over the head of your child.  Mine is about 15 inches long.   Sew the ends of the elastic to the back side of the top of the sweet heart neck line.   
See Picture below:

6. Embellish! 
I used these flowers and hot glued them in place.

This is my Snow White version:

This is my Sleeping Beauty Version:
I added ruffled tulle to the bottom and hot glued the tulle and bows on the sides.


I would LOVE to see if you made one! Please add a picture to our Flickr Group!

Linking to:
Home Stories A2Z Today's Creative Blog

Content Ad